Step by step
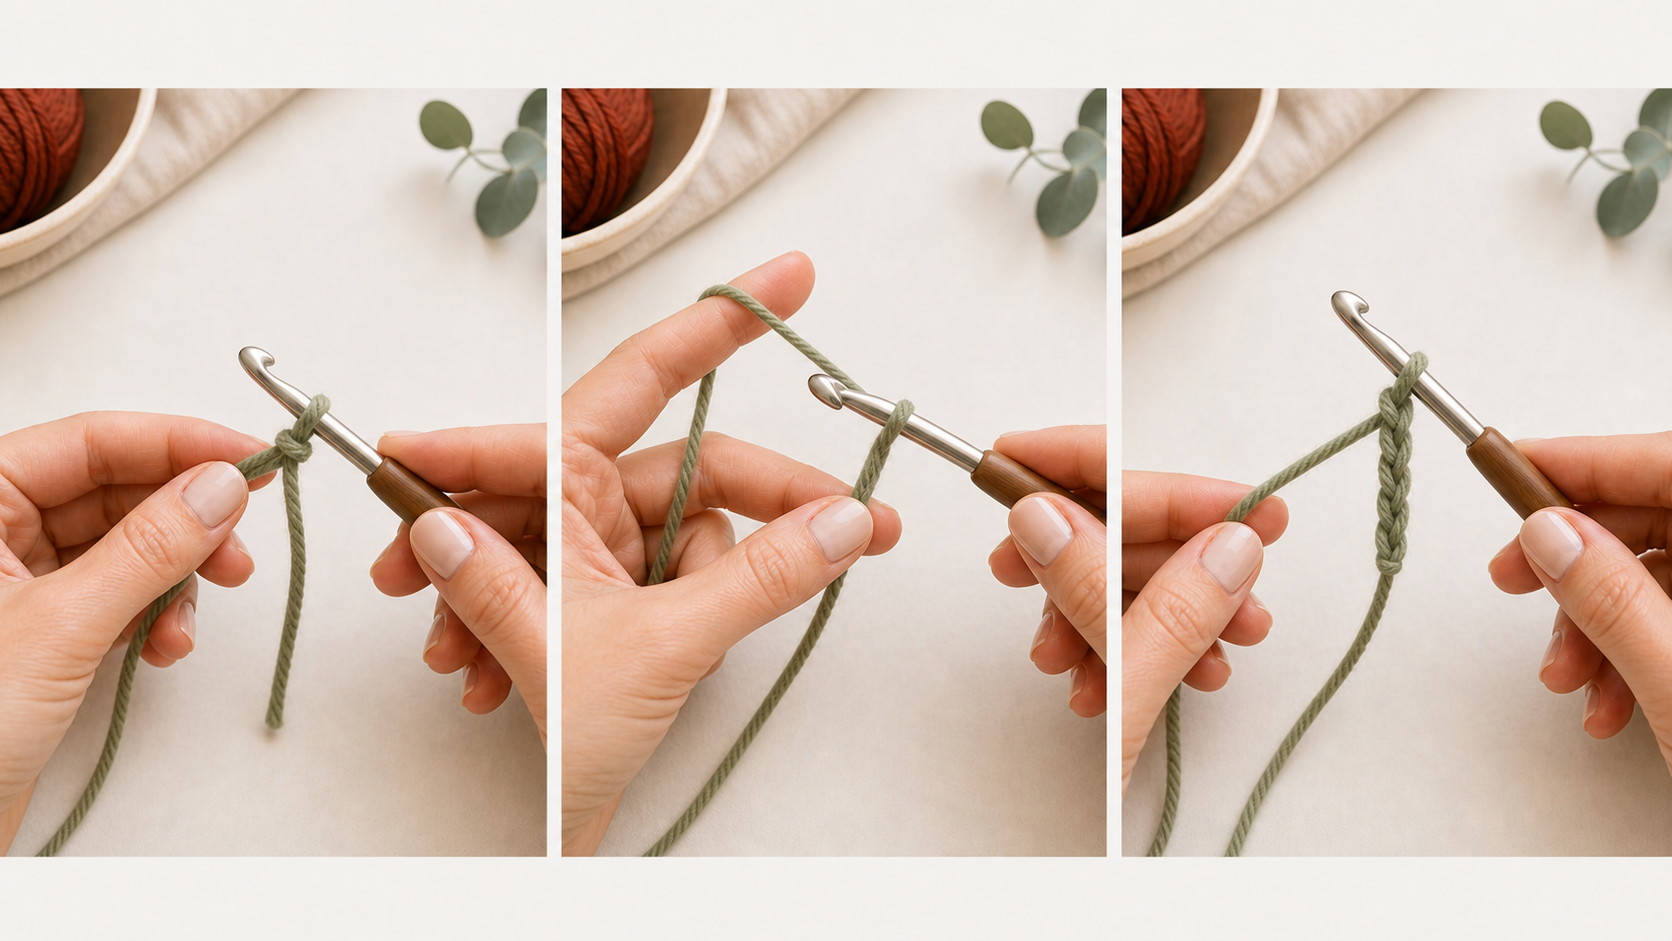
Start with the slip knot on your hook
Place the slip knot on the shaft of the hook, not the very tip. Hold the yarn tail and working yarn lightly so the loop stays steady.
Check: The loop can slide on the hook without falling off.
Wrap the yarn over the hook
Bring the working yarn over the hook from back to front. This motion is called a yarn over.
Check: The yarn sits in the hook groove and is ready to pull through.
Pull through the loop
Use the hook to pull the yarn over through the loop already on your hook. One chain stitch is now made.
Check: There is one new V-shaped chain below the hook.
Repeat with relaxed tension
Yarn over and pull through again. Try to keep each chain the same size, but do not tighten after every stitch.
Check: The chain bends gently and does not curl into a stiff cord.
Count the V shapes
Count each visible V in the chain. The loop on the hook does not count as a chain stitch.
Check: You can count 10 chains without including the loop on the hook.
Practice
- Make a chain of 25 stitches, then pull it out and repeat twice.
- Compare the first 5 chains with the last 5 chains and look for tension changes.
- Practice counting chains from the hook and from the starting tail.
Common mistakes
The chain is too tight to work into.
Hold the yarn more lightly or use a slightly larger hook while practicing.
The chain has uneven big and small loops.
Slow down and pull each new loop to the same height on the hook shaft.
The chain twists while counting.
Lay it flat on the table and follow the V shapes with your finger.