Step by step
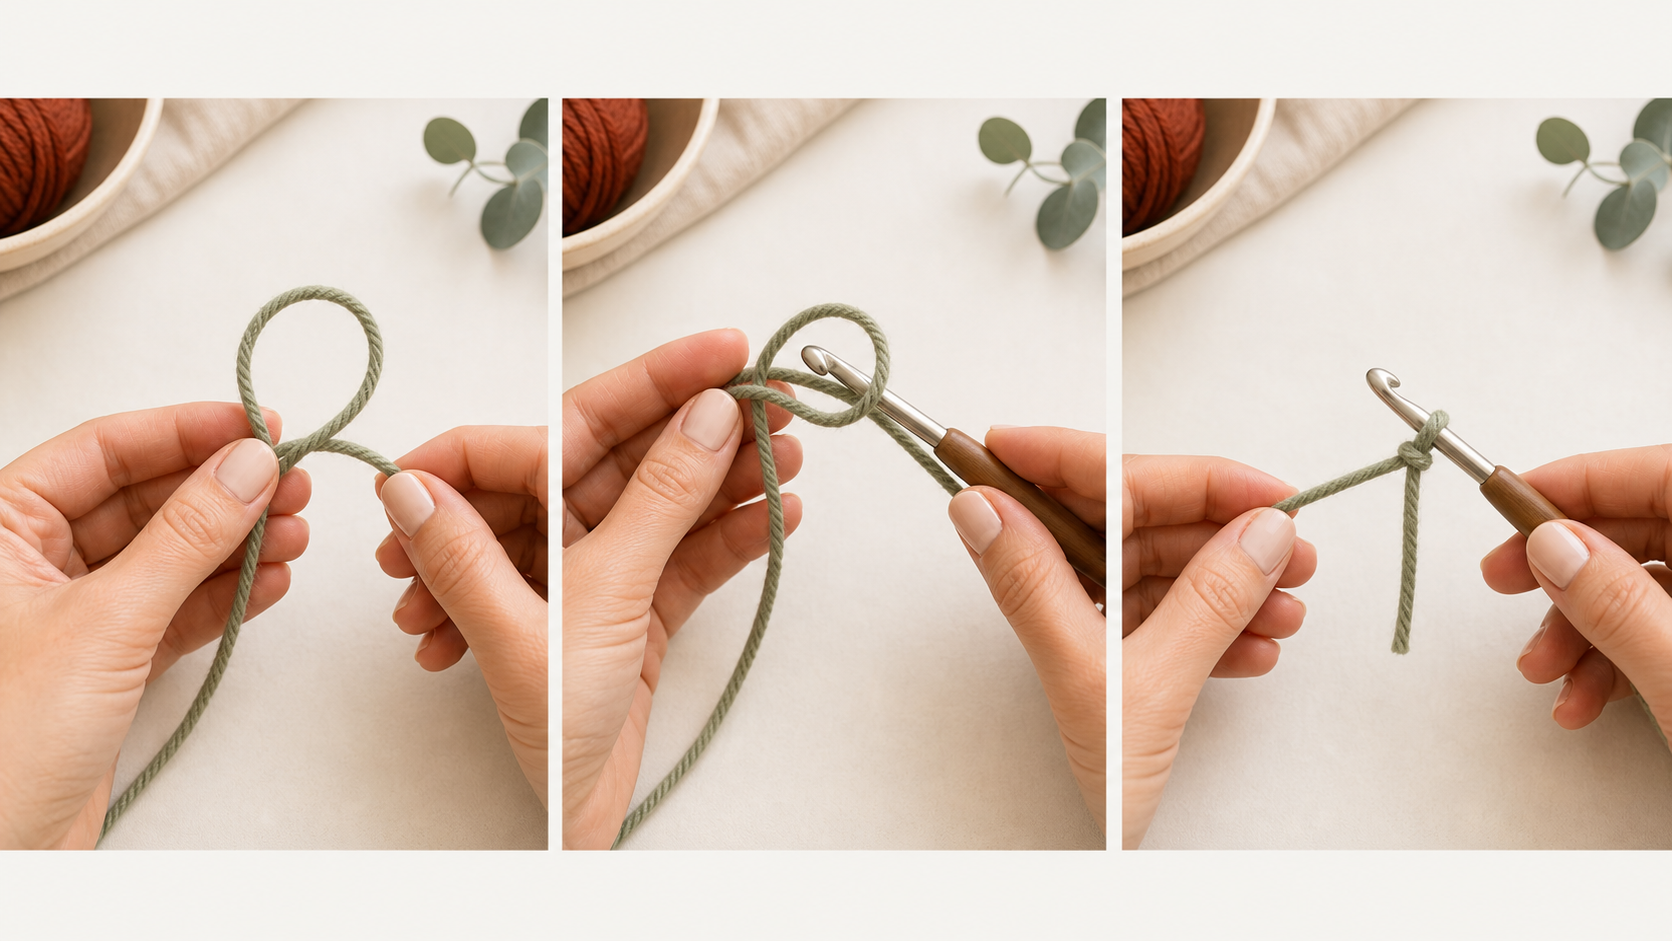
Lay the yarn in front of you
Place the yarn tail on one side and the working yarn connected to the ball on the other. Give yourself several inches of tail so your fingers have room to move.
Check: You can clearly tell which strand is the tail and which strand comes from the yarn ball.
Make a loop
Cross the working yarn over the tail to form a simple loop. Hold the crossing point gently with your fingers so the loop does not collapse.
Check: The loop is open and the crossing point is easy to pinch.
Pull a strand through
Use your fingers or hook to pull a small bend of working yarn through the loop. Do not pull the whole strand through; you only need a new loop.
Check: A small loop comes through the first loop while the tail remains visible.
Place the loop on your hook
Slide the new loop onto the crochet hook. Hold the hook in your dominant hand and the yarn tail in the other hand.
Check: The loop sits around the hook shaft, not on the very tip.
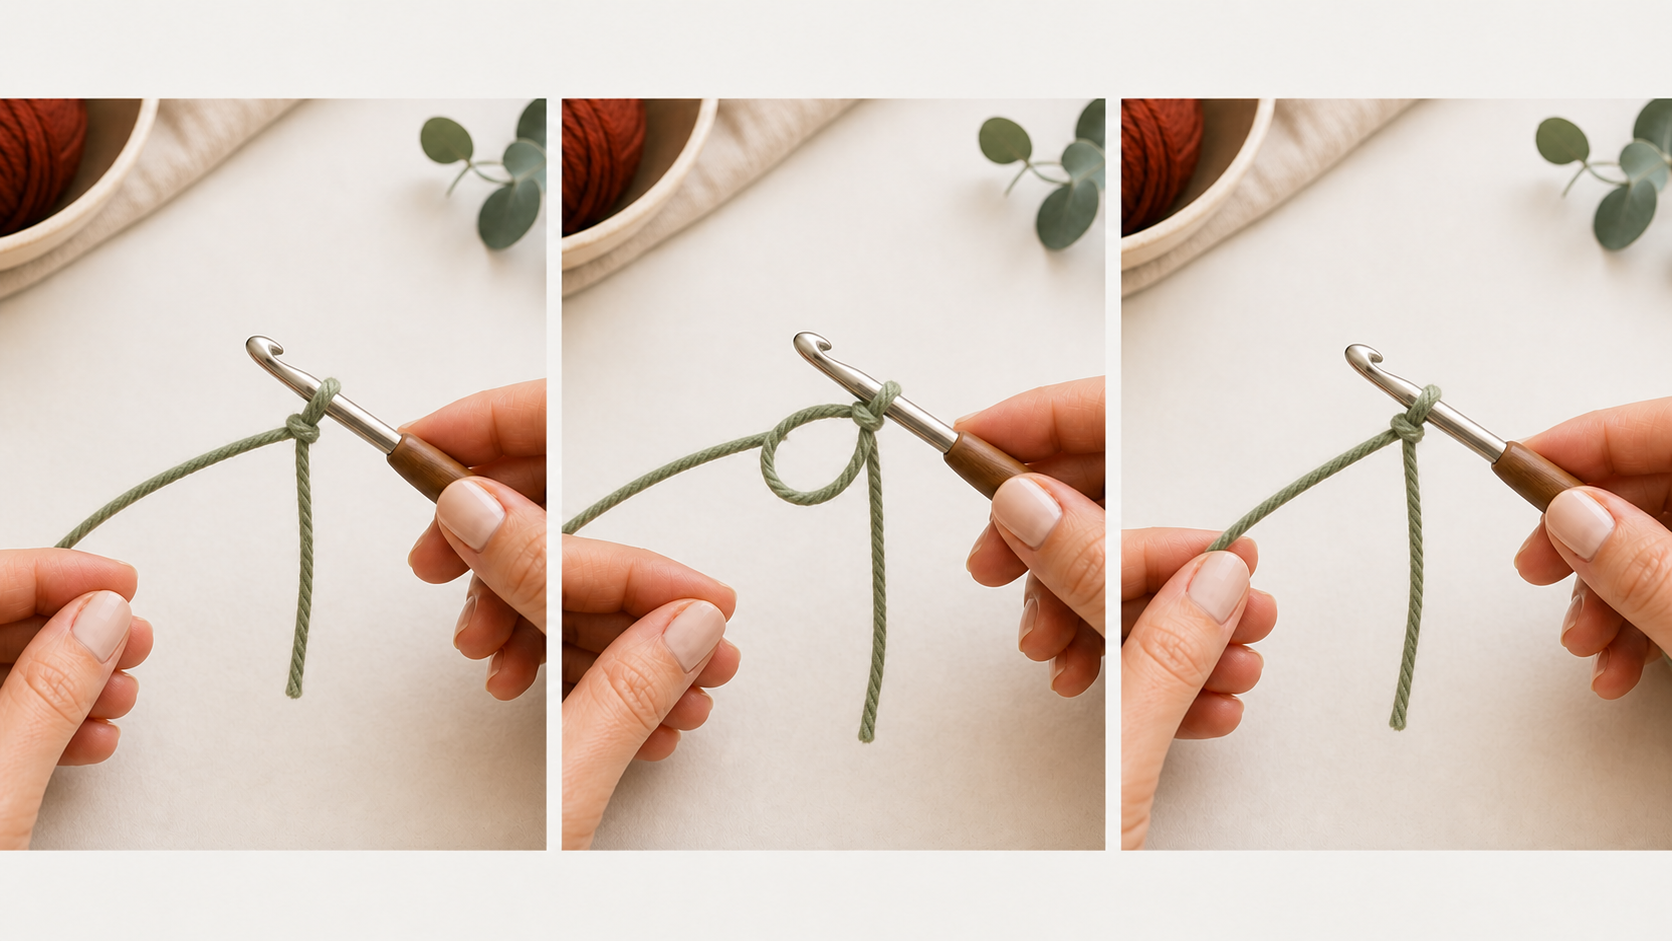
Tighten until it can slide
Pull the working yarn and tail gently until the knot hugs the hook. It should move along the hook with a small push, not grip it tightly.
Check: The hook can move inside the loop without stretching the yarn out of shape.
Tension check
What the knot should feel like
A good slip knot is snug, but not stuck. It should slide when you guide it and hold its shape when you start chaining.
Practice
- Make 10 slip knots in a row, removing each one before making the next.
- Try one knot that is too loose, one that is too tight, and one that slides comfortably.
- Once it feels natural, make a slip knot and immediately chain 10 stitches.
Common mistakes
The loop falls off the hook.
Tighten the knot slightly and keep the loop on the hook shaft instead of the hook tip.
The knot will not slide.
Loosen it before you start chaining. A slip knot should adjust when you pull gently.
The yarn twists into a tangled knot.
Reset the yarn on the table and make a larger loop. Bigger movements are easier when learning.