Step by step
Stop before the last pull-through
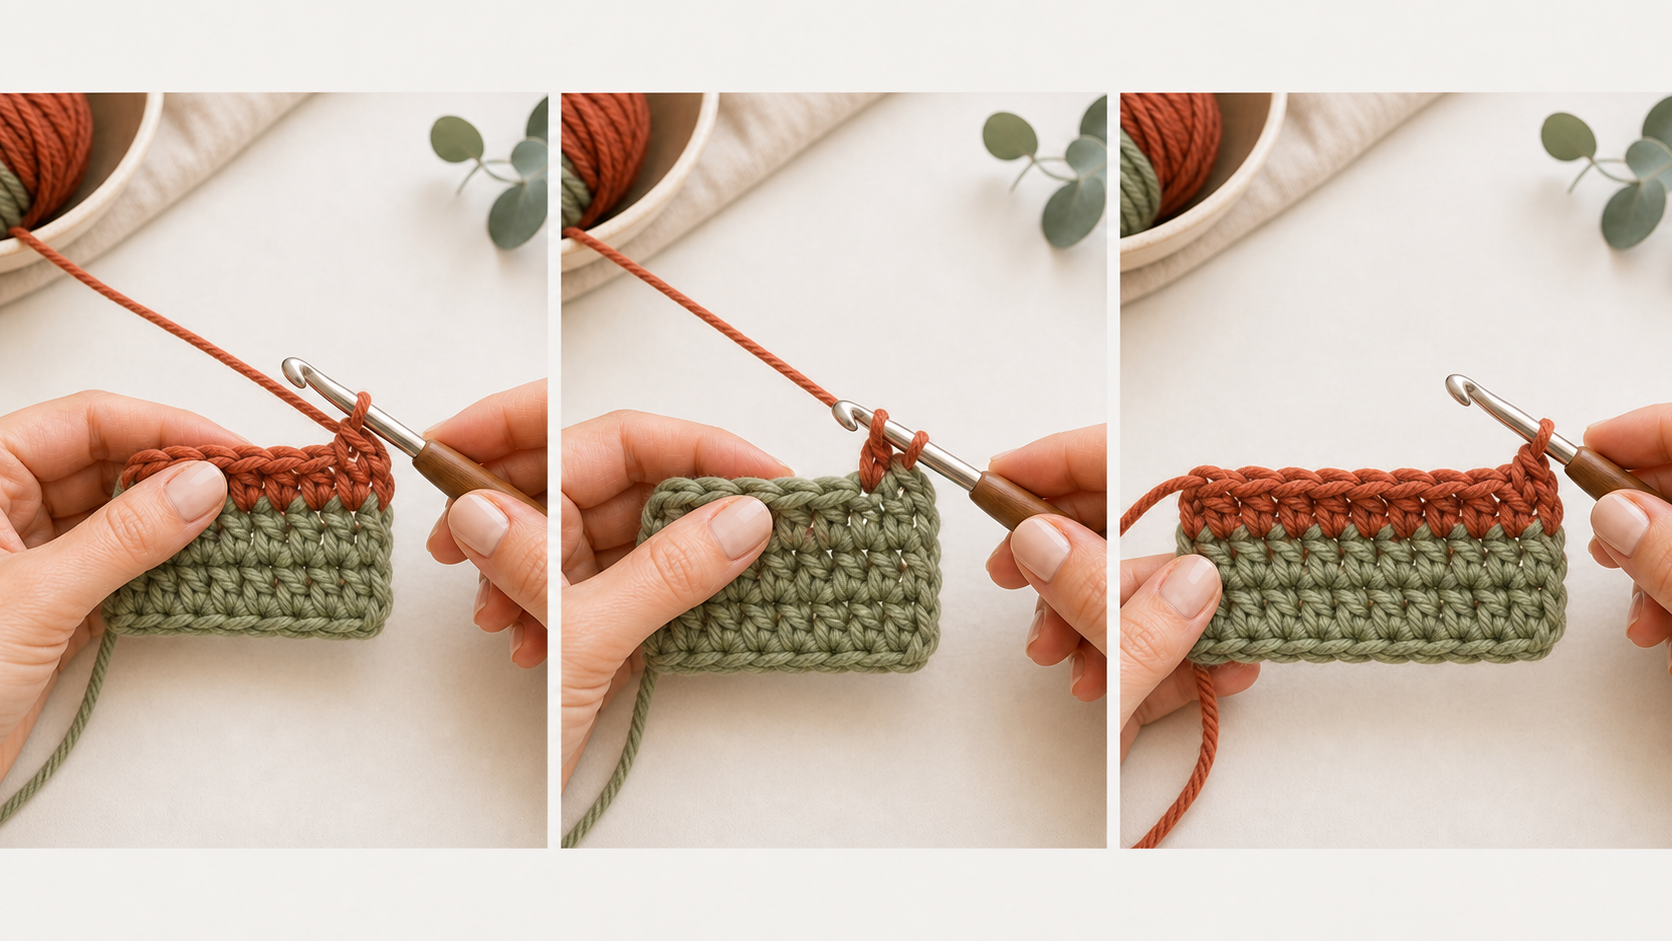
Work the final stitch in the old color until the last yarn over remains. Do not complete the stitch yet.
Check: The old color stitch is almost finished, with loops still on the hook.
Add the new color
Place the new color over the hook and pull it through the remaining loops to finish the stitch.
Check: The new color is now the loop on your hook.
Continue with the new color
Work the next stitch using the new yarn. Hold both tails gently for the first few stitches.
Check: The new row or section starts cleanly in the new color.
Secure tails without knots
Leave enough tail to weave in later. Avoid tight knots that create bumps in the fabric.
Check: Both yarn tails are long enough to weave in.
Check the right side
Look at the front of the fabric and make sure the color change happened where you wanted it.
Check: The stripe or color block looks neat from the front.
Practice
- Make a 4-row sample with two colors.
- Change color at the end of a row.
- Weave in the tails and inspect both sides.
Common mistakes
The old color shows in the first new stitch.
Switch colors during the final pull-through of the previous stitch.
The join feels bulky.
Avoid tying thick knots; weave tails through nearby stitches instead.
The edge looks loose.
Hold yarn tails gently for the first few stitches, then tighten only enough to neaten.