
Pattern guide
Helpful notes for making this pattern
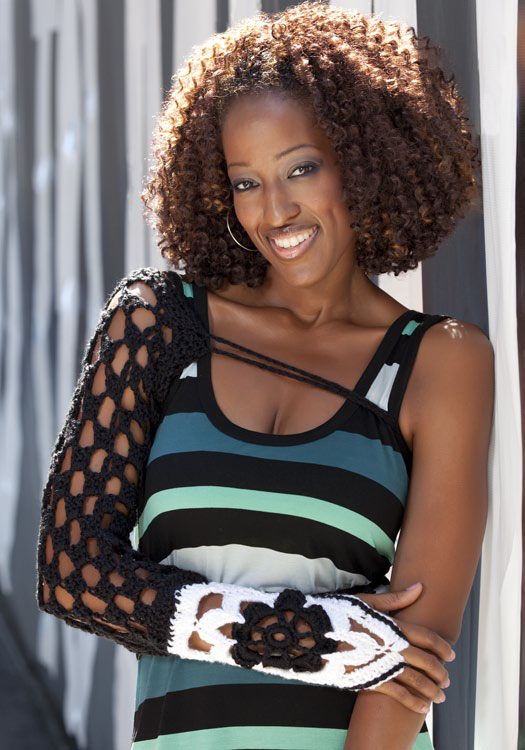
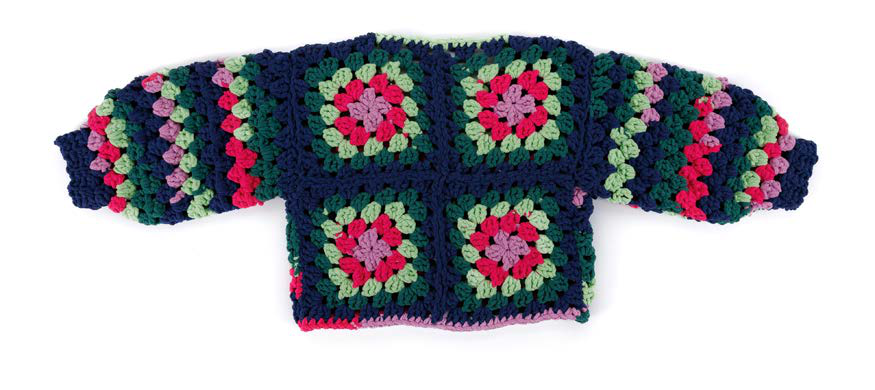
The Free Elegant Granny Square Top Crochet Pattern offers a stylish and versatile addition to any wardrobe. This project is perfect for beginners looking to enhance their skills while creating a beautiful piece that can be worn alone or layered. With its super bulky yarn and engaging granny square motifs, this top not only showcases your crochet talents but also provides a cozy and fashionable option for casual outings or special events. The combination of vibrant colors adds a cheerful touch, making it an enjoyable project to work on.
Why this project is worth making
- The granny square design allows for creative color combinations, making each top unique.
- It’s a quick project due to the super bulky yarn, perfect for those looking for a satisfying finish in a short time.
- This top is versatile, suitable for various occasions, and can be styled in multiple ways.
Maker tips before you begin
- Before starting, familiarize yourself with the granny square technique to ensure smooth progress.
- Keep your tension consistent throughout the project to maintain an even appearance in your squares.
- Use stitch markers to keep track of your rounds, especially when working with multiple colors.
- Consider making a gauge swatch before starting to ensure your squares will fit together correctly.
Ways to customize it
- Adjust the number of squares to create a larger or smaller top, depending on your desired fit.
- Experiment with different color schemes or gradients to personalize your top and match your wardrobe.
- Add embellishments like lace trims or decorative buttons to enhance the overall look and make it your own.
Troubleshooting notes
- If your squares are curling at the edges, check your tension and consider using a larger hook size.
- Ensure that your squares are the correct size by measuring them against the gauge before assembling.
- If your seams are bulky, try using a slip stitch or whip stitch for a flatter finish when joining the pieces.
Care and finishing
- After completing your top, block it to shape and set the stitches, ensuring a polished final look.
- When washing, use a gentle cycle and cold water to maintain the integrity of the yarn and colors.
Instructions
Motif (Make 4)
0/6Notes
- •Motifs begin with Color 1 (shortest color rep) from center.
- •Each color aligns with 1 rnd in the Motif, with 5 colors in total.
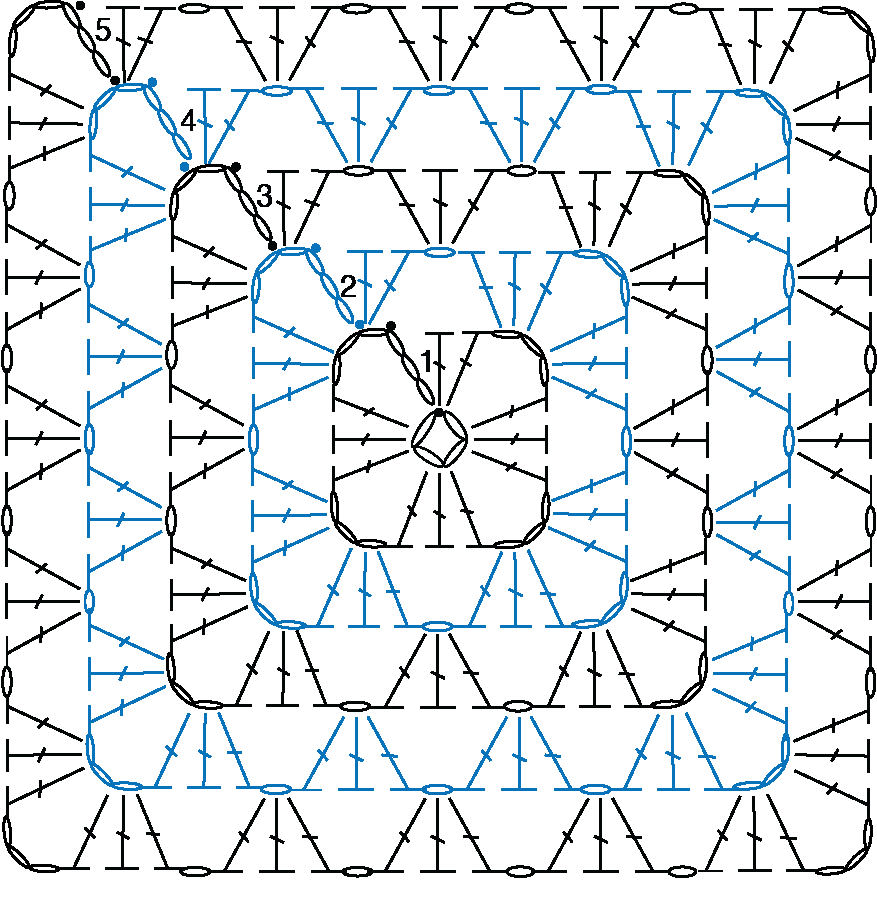
Ch 4. Join with sl st to first ch to form ring.
1st rnd: (RS). Ch 6. (3 dc. Ch 3) 3 times in ring. 2 dc in ring. Join.
2nd rnd: Sl st in next ch-3 sp. Ch 6. 3 dc in same sp as last sl st. *Ch 1. (3 dc. Ch 3. 3 dc) in next corner ch-3 sp. Rep from * twice more. Ch 1. 2 dc in first ch-3 sp. Join.
3rd rnd: Sl st in next ch-3 sp. Ch 6. 3 dc in same sp as last sl st. *Ch 1. 3 dc in next ch-1 sp. Ch 1. (3 dc. Ch 3. 3 dc) in next corner ch-3 sp. Rep from * twice more. Ch 1. 3 dc in last ch-1 sp. Ch 1. 2 dc in first ch-3 sp. Join.
4th and 5th rnds: Sl st in next ch-3 sp. Ch 6. 3 dc in same sp as last sl st. *(Ch 1. 3 dc) in each ch-1 sp to next corner ch-3 sp. Ch 1.** (3 dc. Ch 3. 3 dc) in next corner ch-3 sp. Rep from * twice more, then from * to ** once. 2 dc in first corner ch-3 sp. Join.
Fasten off, leaving 42" [106.5 cm] tail.
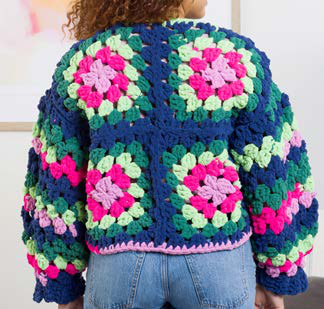
Back
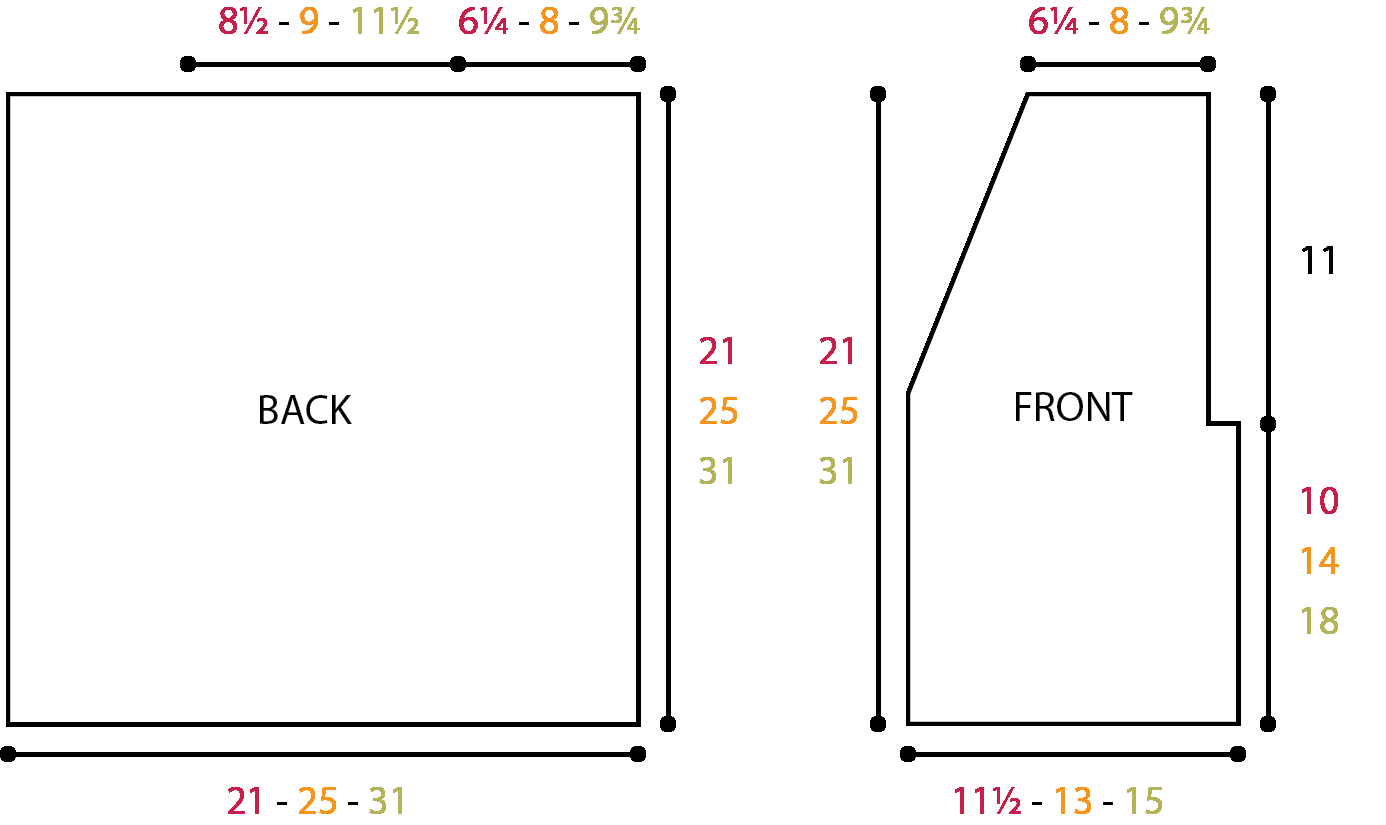
0/1Using rem tails from Motifs, with RS facing, sew Motifs tog into a 2 x 2 square.
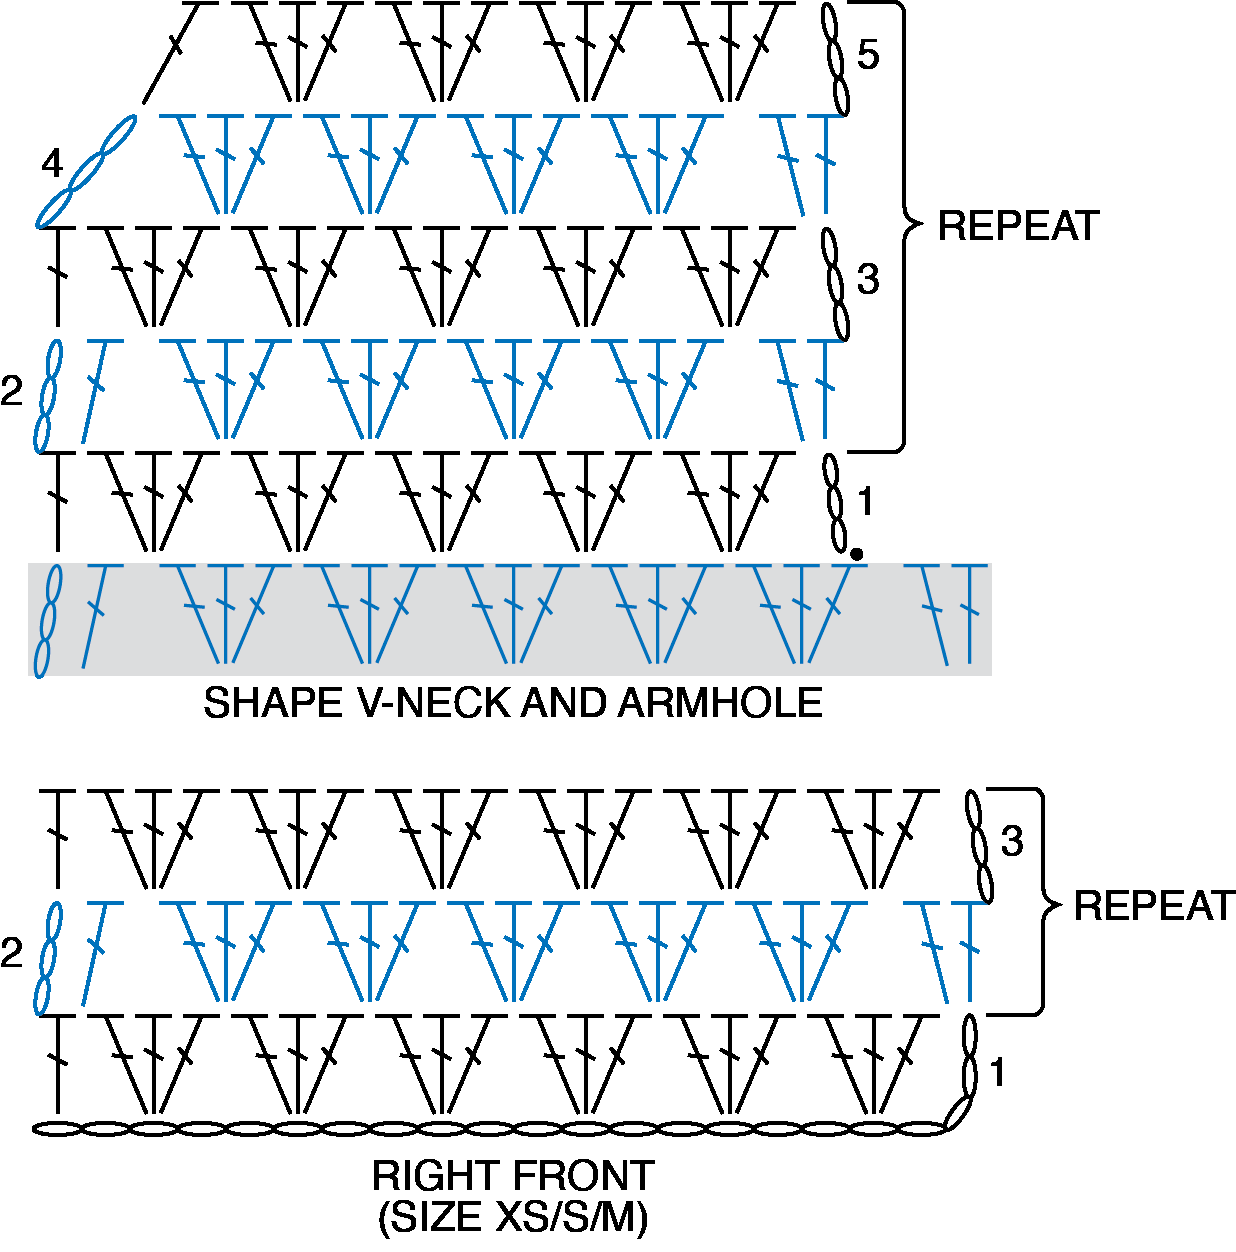
Right Front
0/6Notes
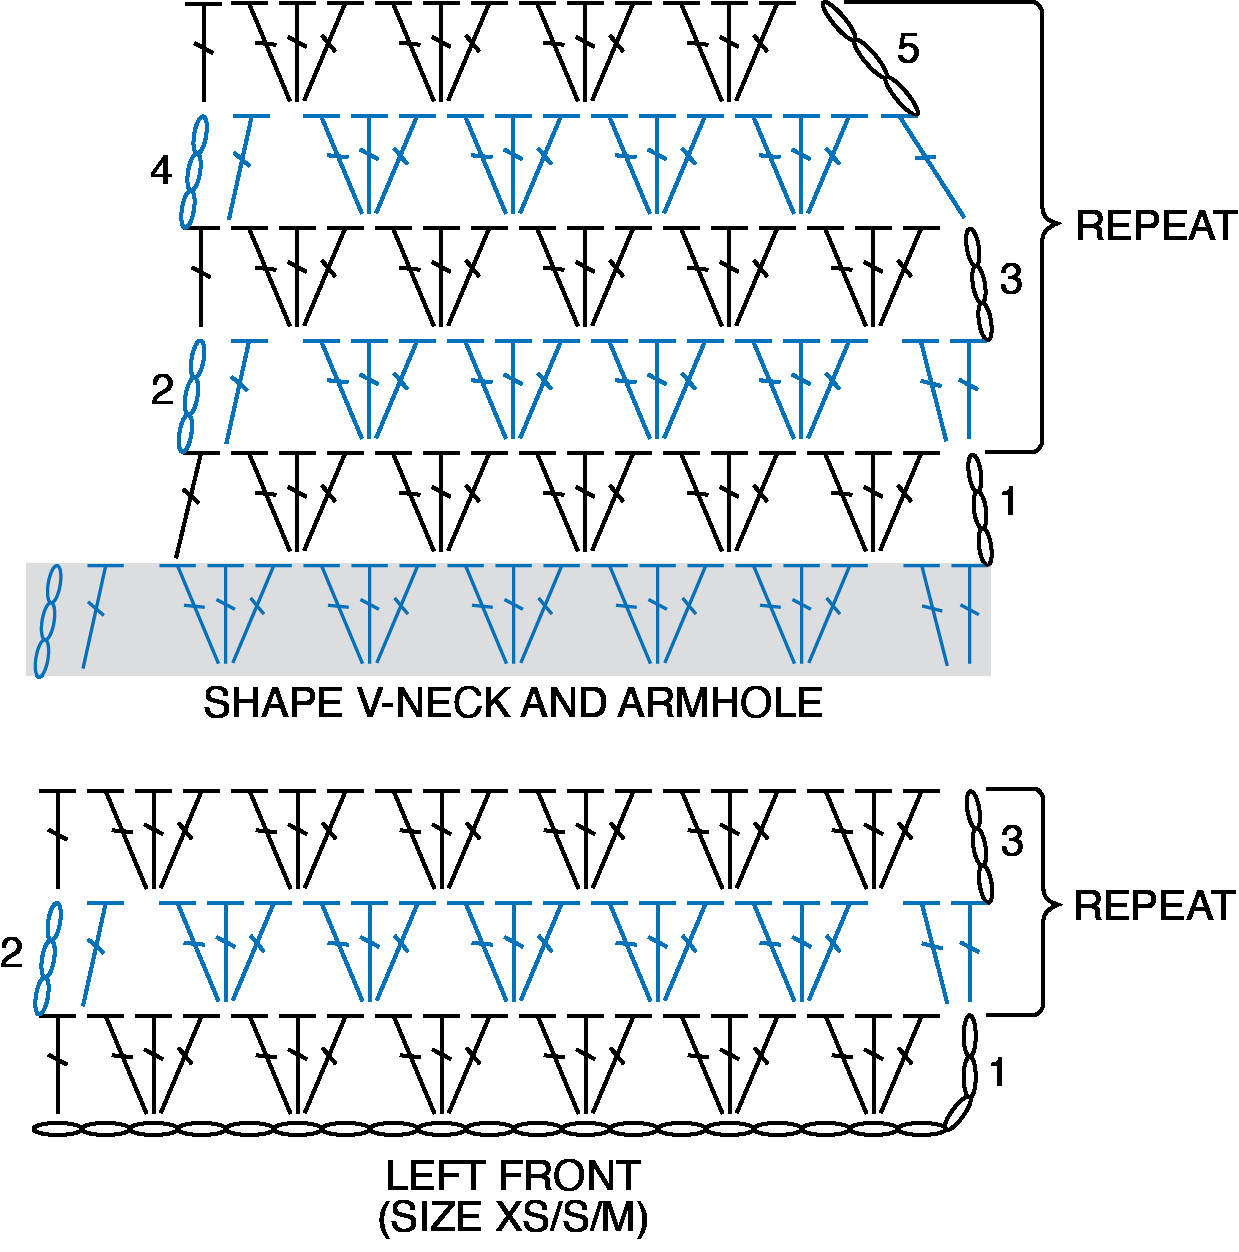
- •Shape V-neck and armhole.
1st row: (RS). Sl st in each of first 3 dc. Ch 3. Skip next 2 dc. 3 dc in sp between skipped 2 dc and next 3-dc group.
*Skip next 3-dc group. 3 dc in sp between skipped and next 3-dc groups. Rep from * to last 2 dc. Skip next dc. 1 dc in last dc. Turn.
2nd row: Ch 3. 1 dc in sp between 1st and 2nd dc. *Skip next 3-dc group. 3 dc in sp between skipped and next 3-dc groups. Rep from * to last 4 dc. Skip next 3-dc group. 1 dc in sp between last 3-dc group and last dc. 1 dc in last dc. Turn.
3rd row: Ch 3. Skip next dc. 3 dc in sp between skipped dc and next 3-dc group.
*Skip next 3-dc group. 3 dc in sp between skipped and next 3-dc groups. Rep from * to last 5 dc. Skip next 3-dc group. 3 dc in sp between last skipped 3-dc group and last dc. 1 dc in last dc. Turn.
Rep 2nd and 3rd rows 3 (5-7) times more, then rep 2nd row once.
Left Front
0/1Work from ** to ** as given for Right Front.
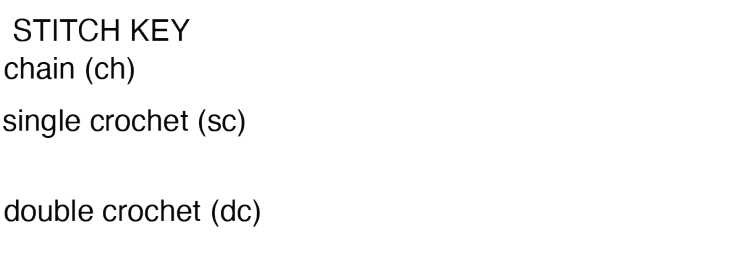
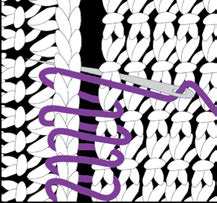
Sleeves
0/15Notes
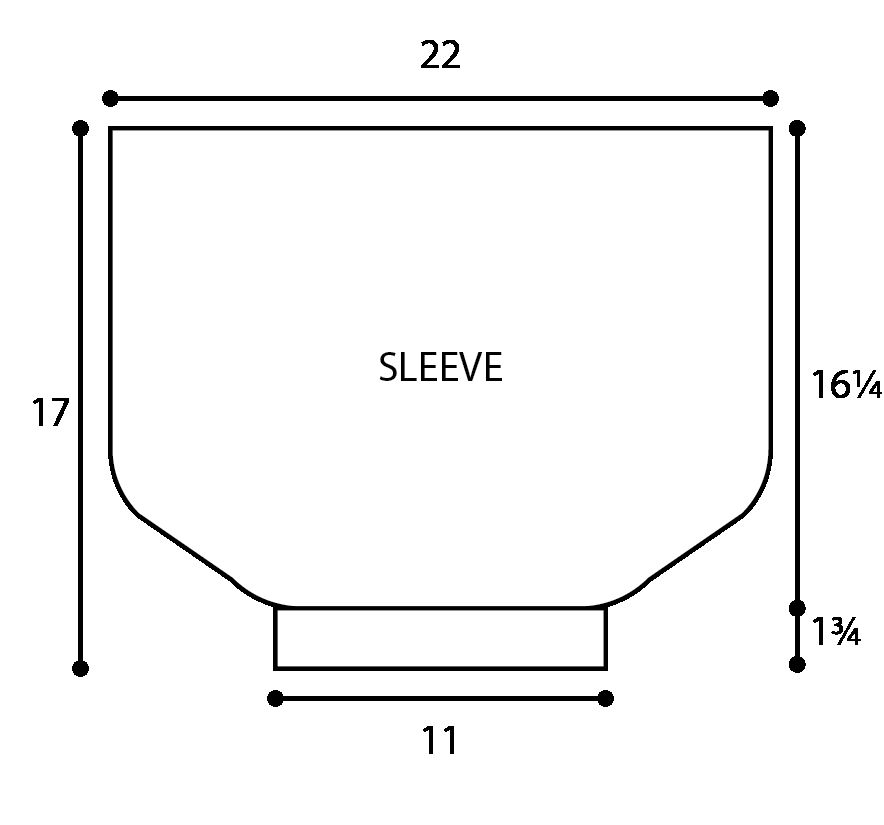
- •Sleeves are worked flat, from cuff up.
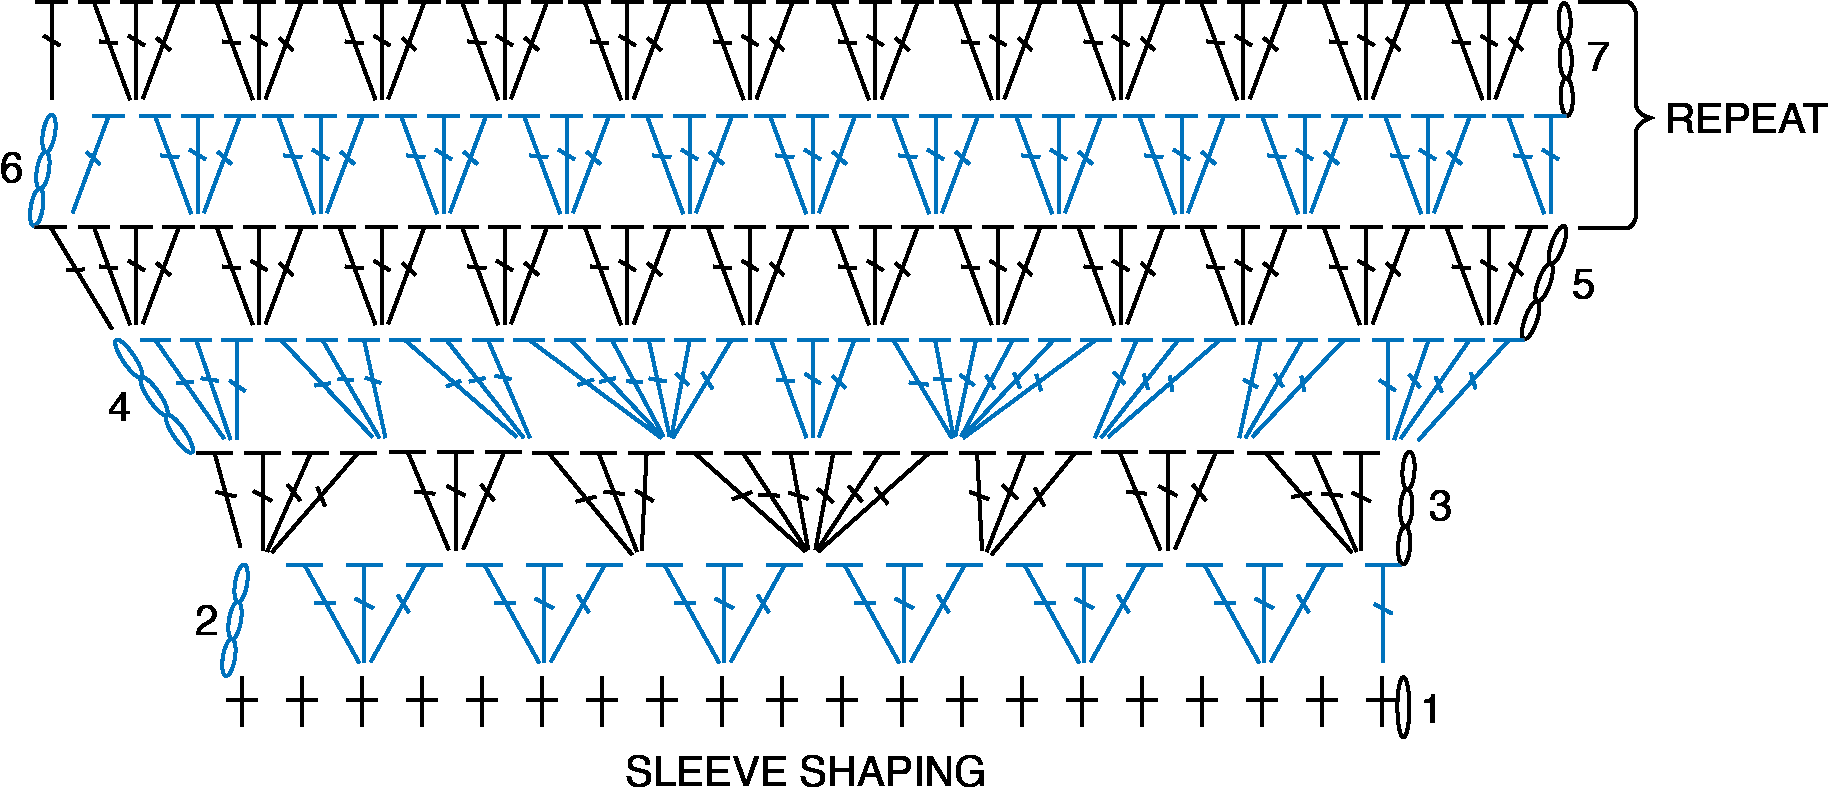
Cuff: Ch 4.
1st row: (RS). 1 sc in 2nd ch from hook. 1 sc in each of last 2 ch. Turn.
2nd row: Ch 1. Working in back loops only, 1 sc in each sc to end of row. Turn.
Rep 2nd row until work from beg, when slightly stretched, measures 11" [28 cm], ending on a WS row.
Do not fasten off. Turn work sideways and proceed across longer side as follows:
1st row: (RS). Ch 1. Work 20 sc evenly across. Turn.
2nd row: Ch 3. Skip first 2 sc. 3 dc in next sc. *Skip next 2 sc. 3 dc in next sc. Rep from * to last 2 sc. Skip next sc. 1 dc in last sc. Turn.
3rd row: Ch 3. 3 dc in sp between 1st and 2nd dc. (Skip next 3-dc group. 3 dc in sp between skipped and next 3-dc groups) twice.
Skip next 3-dc group. 6 dc in next sp between skipped and next 3-dc groups. (Skip next 3-dc group. 3 dc in sp between skipped and next 3-dc groups) twice.
Skip next 3-dc group. 3 dc in sp between last skipped 3-dc group and last dc. 1 dc in last dc. Turn.
4th row: Ch 3. 3 dc in sp between 1st and 2nd dc. (Skip next 3 dc. 3 dc in sp between skipped and next 3-dc groups) twice.
Skip next 3-dc group. 6 dc in sp between skipped and next 3-dc groups. (Skip next 3-dc group. 3 dc in sp between skipped and next 3-dc groups) twice.
Skip next 3-dc group. 3 dc in sp between last skipped 3-dc group and last dc. 1 dc in last dc. Turn.
8th to 17th rows: Rep 6th and 7th rows 5 times more.
Fasten off.
Finishing
0/3Notes
- •Pin garment pieces to measurements. Cover with a damp cloth, leaving cloth to dry.
With WS facing, align bottom edge of Fronts and Back. Sew side seams from bottom edge to armholes.
Sew shoulder seams, using Flat Seam.
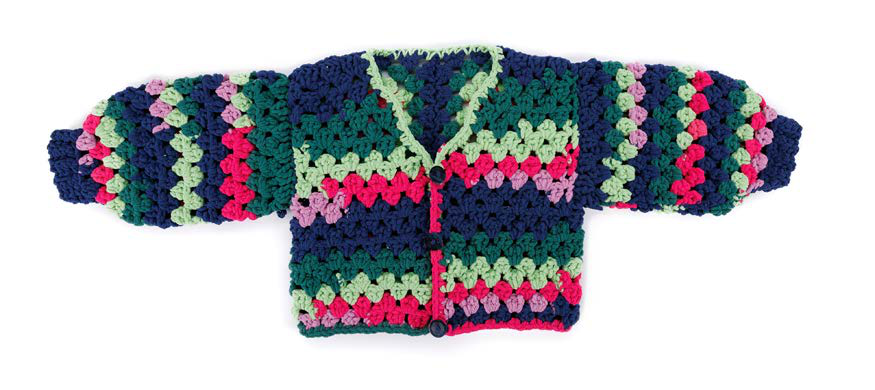
Sew buttons to Left Front along straight edge, having bottom button 1" [2.5 cm] up from foundation chain, top button at V-neck shaping and last button evenly spaced between.
FAQ
Questions about this pattern
Is Free Elegant Granny Square Top Crochet Pattern good for beginners?+
Yes. Free Elegant Granny Square Top Crochet Pattern is marked easy and includes step-by-step instructions, materials, gauge notes, and progress checkboxes.
What yarn weight do I need for Free Elegant Granny Square Top Crochet Pattern?+
This pattern lists Super Bulky (6). If you substitute yarn, make a gauge swatch before starting so the finished size stays close to the pattern notes.
How long does Free Elegant Granny Square Top Crochet Pattern take to crochet?+
The estimated time is 15–20 hours. Your pace may change depending on yarn choice, stitch familiarity, and how much finishing the project needs.
Do I need to check gauge for this crochet pattern?+
Yes. The pattern gauge is 7 dc and 4 rows = 4" [10 cm] in pattern.. Use the listed hook size, U.S. L/11 (8 mm), unless your swatch tells you to adjust. Checking gauge helps avoid a finished project that is too small, too large, or too stiff.
Can I print Free Elegant Granny Square Top Crochet Pattern?+
Yes. Use the Print button near the top of the post for a cleaner pattern view that hides interactive extras and navigation.