Instructions
Free celtic lattice scarf crochet pattern Basics
0/12Notes
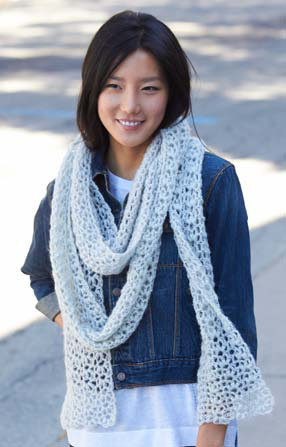
- •This Free celtic lattice scarf crochet pattern includes organized steps, materials, and helpful resources for crocheters.
- •Find similar patterns in our crochet scarves collection.
- •See Diagram 1.
With A, ch 22.
Foundation row: (WS). 1 sc in 2nd ch from hook. 1 sc in each ch to end of chain. Turn. 21 sc.
1st row: (RS). With A, ch 2. 1 hdc in each sc to end of row. Turn. 21 hdc.
2nd row: Ch 1. 1 sc in each of first 2 hdc. Ch 2. Skip next 2 hdc. 1 sc in each of next 2 hdc. (Ch 2. Skip next 2 hdc. 1 sc in next hdc) 3 times. 1 sc in each of next 2 hdc. Ch 2. Skip next 2 hdc. 1 sc in each of last 2 hdc. Turn.
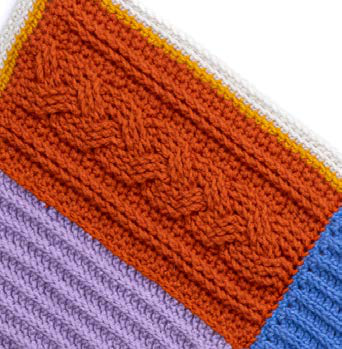
3rd row: Ch 1. 1 sc in each of first 2 sc. 1 dcfp around post of each next 2 sts 2 rows below. 1 sc in each of next 2 sc. Skip next 3 sts 2 rows below. Skip next 3 dcfp. (1 trfp around post of next 3 dcfp 2 rows below. Working behind 3 trfp just made, 1 trfp around post of each of 3 skipped dcfp 2 rows below. 1 sc in each of next 2 sc. 1 dcfp around post of each of next 2 sts 2 rows below. 1 sc in each of last 2 sc. Turn.)
4th and alt rows: Ch 1. 1 sc in each of first 2 sc. Ch 2. Skip next 2 sts. 1 sc in each of next 2 sc. (Ch 2. Skip next 2 sts. 1 sc in next st) 3 times. 1 sc in each of next 2 sc. Ch 2. Skip next 2 sts. 1 sc in each of last 2 sc. Turn.
5th row: Ch 1. 1 sc in each of first 2 sc. 1 dcfp around post of each of next 2 dcfp 2 rows below. 1 sc in each of next 2 sc. 1 dcfp around post of each of next 6 trfp 2 rows below. 1 dcfp around post of each of next 3 dcfp 2 rows below. 1 sc in each of next 2 sc. 1 dcfp around post of each of next 2 dcfp 2 rows below. 1 sc in each of last 2 sc. Turn.
7th row: Ch 1. 1 sc in each of first 2 sc. 1 dcfp around post of each of next 2 dcfp 2 rows below. 1 sc in each of next 2 sc. 1 dcfp around post of each of next 3 dcfp 2 rows below. 1 dcfp around post of each of next 6 trfp 2 rows below. 1 sc in each of next 2 sc. 1 dcfp around post of each of next 2 dcfp 2 rows below. 1 sc in each of last 2 sc. Turn.
9th row: Ch 1. 1 sc in each of first 2 sc. 1 dcfp around post of each of next dcfp 2 rows below. 1 sc in each of next 2 sc. 1 dcfp around post of each of next 3 dcfp 2 rows below. 1 dcfp around post of each of next 6 trfp 2 rows below. 1 dcfp around post of each of next 2 dcfp 2 rows below. 1 sc in each of last 2 sc. Turn.
10th row: As 4th row.
Rep 3rd to 10th rows of Braided Cable Pat for 12" [30.5 cm], ending on 5th or 9th row.
Turn work sideways. Next row: (RS). With A, ch 2. Work 38 hdc evenly down left side of Section 1-1. Join B. Break A.
Section 2-1
0/3Notes
- •See Diagram 2.
- •Check the Craft Yarn Council for standard yarn weight info.
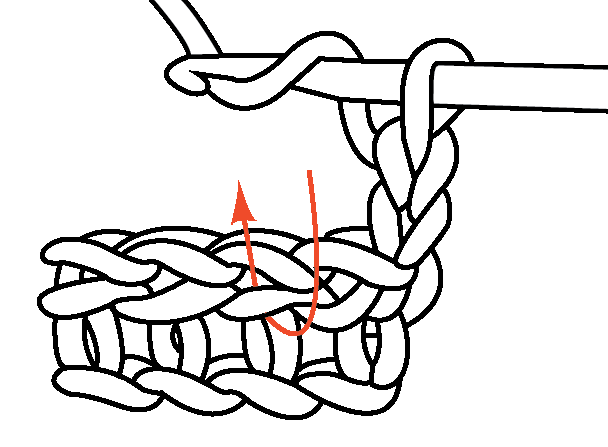
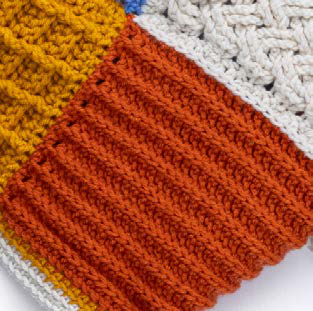
1st row: With B, ch 2. 1 hdchb in previous row of each st to last hdc. (Bar is below loops normally worked on WS – see diagram on page 1). 1 hdc in last hdc. Turn.
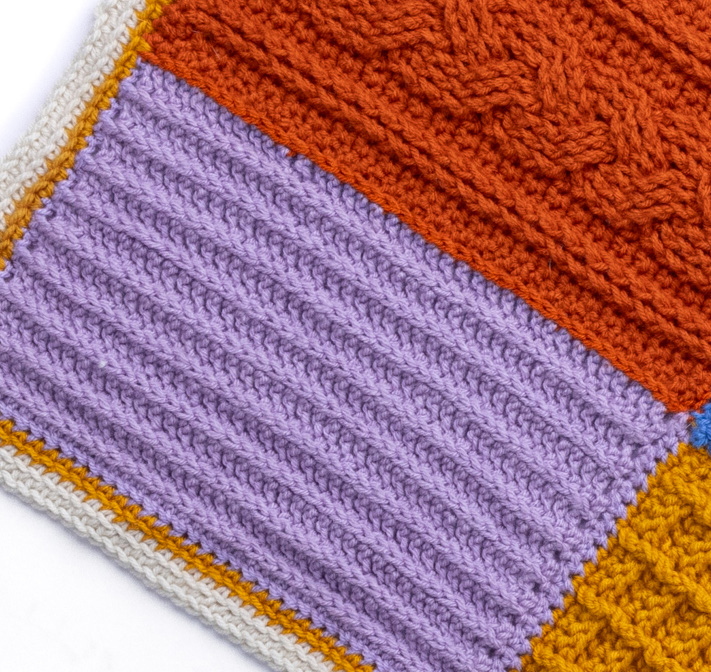
Rep last row for approx 7¼" [19 cm] from color change edge, ending on a WS row. Turn work sideways.
Next row: (WS). With B, ch 1. Work 21 sc evenly across top side edge of Section 2-1 ONLY. Join D. Break B. Turn. 21 sc.
Section 3-1
0/6Notes
- •See Diagram 3.
1st row: (RS). With D, ch 1. 1 sc in each sc to end of row. 21 sc. Turn.
2nd row: Ch 2. 1 hdc in each of first 2 sc. 1 dcbp around next sc. *1 hdc in each of next 3 sc. 1 dcbp around next sc. Rep from * to last 2 sc. 1 hdc in each of last 2 sc. Turn.
3rd rnd: Ch 2. 1 hdc in each of first 2 hdc. 1 dcfp around next dcbp. *1 dcbp around each of next 3 hdc. 1 dcfp around next dcbp. Rep from * to last 2 hdc. 1 hdc in each of last 2 hdc. Turn.
4th row: Ch 2. 1 hdc in each of first 2 hdc. 1 dcbp around next dcfp. *1 hdc in each of next 3 dcbp. 1 dcbp around next dcfp. Rep from * to last 2 hdc. 1 hdc in each of last 2 hdc. Turn.
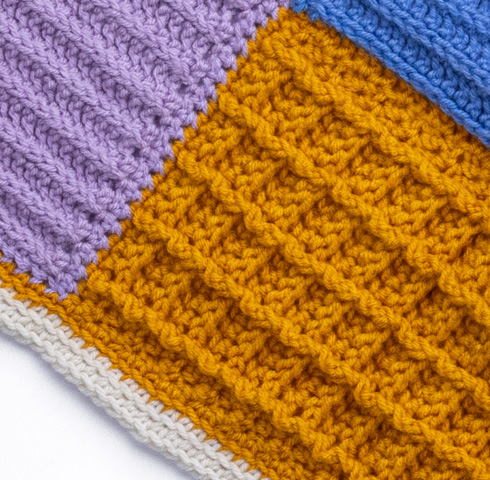
Rep 3rd and 4th rows for Waffle Pat until work from color change measures 12" [30.5 cm], ending on WS row. Turn work sideways.
Next row: (WS). With D, ch 2. Work 38 hdc evenly down right side of Section 3-1. Join C. Break D.
Section 4-1
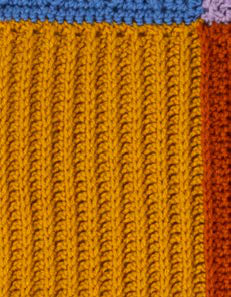
0/2With C, work from ** to ** as given for Section 2-1, ending on a RS row. Turn work sideways.
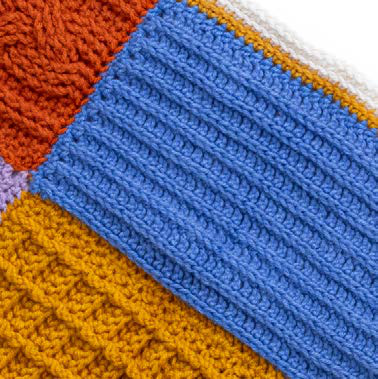
Next row: (RS). With C, ch 1. Work 22 sc evenly across top side edge of Section 4-1. Join MC. Break C. Turn. 22 sc.
Section 5-1
0/6Notes
- •See Diagram 4.
- •For more patterns like this, browse our patterns catalog.
1st row: (WS). With MC, ch 2. 1 hdc in each sc to end of row. 22 hdc. Turn.
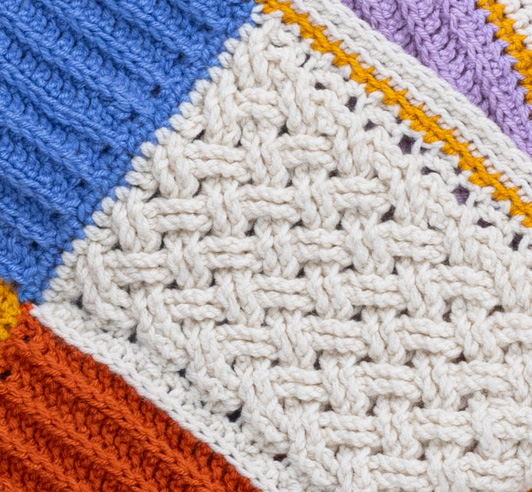
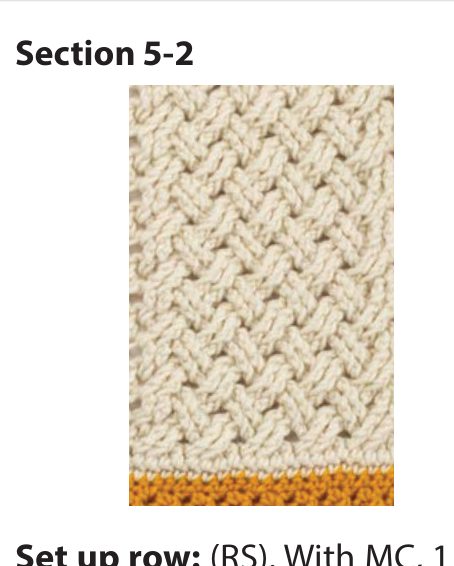
2nd row: Ch 2. 1 dc in first hdc. *Skip next 2 hdc. 1 trfp around each of next 2 hdc. Working in front of just worked sts, 1 trfp around each of 2 skipped hdc. Rep from * to last hdc. 1 dc in last hdc. Turn.
3rd row: Ch 2. 1 dc in first dc. 1 trbp around each of next 2 sts. *Skip next 2 sts. 1 trbp around each of next 2 sts. Working behind just worked sts, 1 trbp around each of 2 skipped sts. Rep from * to last 3 sts. 1 trbp around each of next 2 sts. 1 dc in last dc. Turn.
4th row: Ch 2. 1 dc in first dc. *Skip next 2 sts. 1 trfp around each of next 2 sts. Working in front of just worked sts, 1 trfp around each of 2 skipped sts. Rep from * to last dc. 1 dc in last dc. Turn.
Rep 3rd and 4th rows for Celtic Texture Pat until work from color change measures 12" [30.5 cm], ending on RS row. Turn work sideways.
Next row: (RS). With MC, ch 2. Work 38 hdc evenly down left side of Section 5-1. Join A. Break MC.
Section 6-1
0/9Notes
- •See Diagram 5.
1st row: (RS). With C, ch 1. 1 sc in each sc to end of row. Turn. 21 sc.
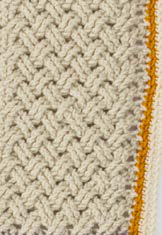
2nd row: Ch 1. 1 sc in each of first 2 sc. PM around post of last sc made. *1 sc in each of next 5 sts. PM around post of last sc made. 1 sc in next st. PM around post of last sc made. Rep from * to last 7 sc. 1 sc in each of next 5 sc. PM around post of last sc made. 1 sc in each of last 2 sc. Turn.
3rd and 4th rows: Ch 1. 1 sc in each sc to end of row. Turn.
5th row: Ch 1. 1 sc in each of first 4 sc. 1 trfp around first marked sc 3 rows below. 1 trfp around next marked sc 3 rows below. Working in top of 4th row, skip next 2 sc. *1 sc in each of next 4 sc. (1 trfp around next marked sc 3 rows below) twice. Working in top of 4th row, skip next 2 sc. Rep from * to last 3 sc. 1 sc in each of last 3 sc. Turn.
6th row: Ch 1. 1 sc in each of first 4 sts. *PM around post of last sc made. 1 sc in next st. PM around post of last sc made. 1 sc in each of next 5 sts. Rep from *, ending last rep with 1 sc in each of last 4 sc. Turn.
7th and 8th rows: Ch 1. 1 sc in each sc to end of row. Turn.
9th row: Ch 1. 1 sc in each of first 2 sc. 1 trfp around first marked sc 3 rows below (6th row). Working in top of 8th row, skip next sc. 1 sc in each of next 4 sc. *(1 trfp around next marked sc 3 rows below) twice. Working in top of 8th row, skip next 2 sc. 1 sc in each of next 4 sc. Rep from * to last 2 sc. 1 trfp around next marked sc 3 rows below. Working in top of 8th row, skip next sc. 1 sc in last sc. Turn.
Rep 2nd to 9th rows for Lattice Pat until work from color change measures 12" [30.5 cm], ending on WS row. Turn work sideways.
Next row: (WS). With C, ch 2. Work 38 hdc evenly down right side of Section 6-1. Join B. Break C.
Section 2-2
0/2With A, work from ** to ** as given for Section 2-1, ending on a WS row. Turn work sideways.
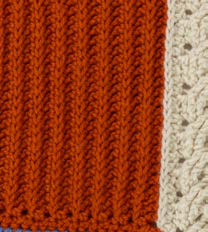
Next row: (WS). With A, ch 1. Work 21 sc evenly across top side edge of Section 2-2 ONLY. Join C. Break A. Turn. 21 sc.
Section 4-2
0/2With B, work from ** to ** as given for Section 2-1, ending on a RS row. Turn work sideways.
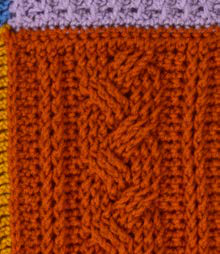
Next row: (RS). With B, ch 1. Work 21 sc evenly across top side edge of Section 4-2. Join A. Break B. Turn. 21 sc.
Section 1-2
0/3Set up row: (WS). With A, 1 sc in each sc to end of row.
With A, work from *** to *** as given for Section 1-1.
Turn work sideways. Next row: (RS). With A, ch 2. Work 38 hdc evenly down left side of Section 1-2. Join D. Break A.
Section 2-3
0/2With D, work from ** to ** as given for Section 2-1, ending on a WS row. Turn work sideways.
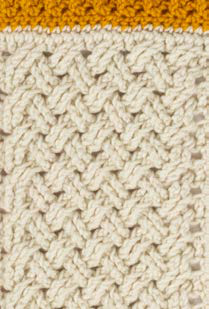
Next row: (WS). With D, ch 1. Work 22 sc evenly across top side edge of Section 2-3 ONLY. Join MC. Break D. Turn. 22 sc.
Section 5-2
0/3Set up row: (RS). With MC, 1 sc in each sc to end of row.
Work from **** to **** as given for Section 5-1, ending on a WS row. Turn work sideways.
Next row: (WS). With MC, ch 2. Work 38 hdc evenly down right side of Section 5-2. Join B. Break MC.
Section 4-3
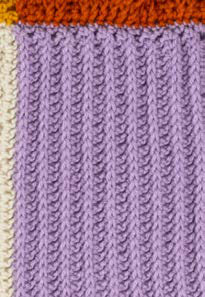
0/1With B, work from ** to ** as given for Section 2-1, ending on a RS row. Fasten off.
Finishing
0/4Notes
- •You can also find this project and others on Ravelry.
Sew any sections that were not attached "as you go" using matching color and whip stitch.
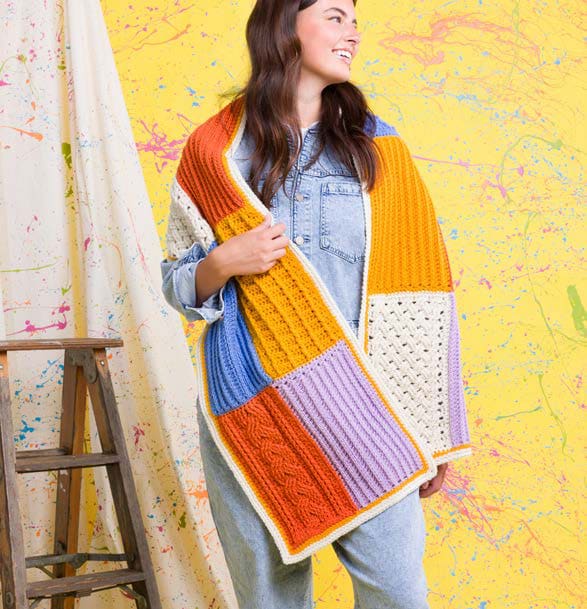
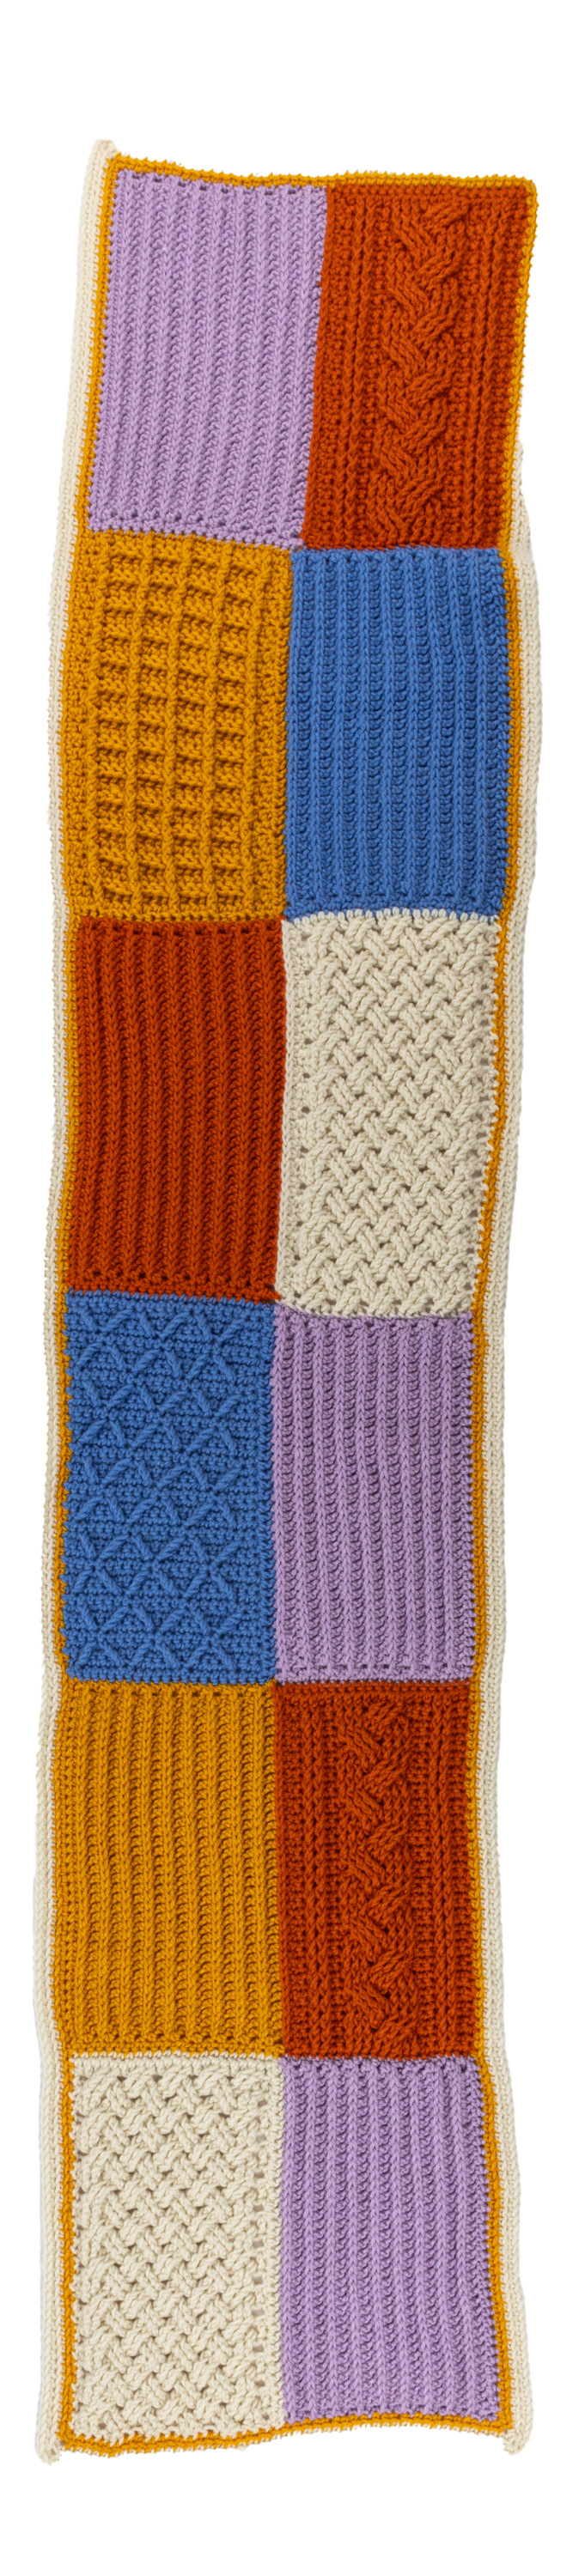
Pin Scarf on a flat surface to measurements (Approx 15" x 72" [38 x 183 cm]). Cover with a damp cloth leaving cloth to dry.
Edging: 1st rnd: (RS). Join D with sl st to top right corner. Ch 1. 2 sc in same sp as sl st. Work 21 sc evenly across top side edge of Section 4-3. Work 21 sc evenly across top edge of Section 5-2. 3 sc in corner. Work 38 sc across each of next 6 Sections down left side of Scarf. 3 sc in corner. Work 21 sc evenly across bottom side edge of Section 2-1. Work 21 sc evenly across bottom edge of Section 1-1. 3 sc in corner. Work 38 sc evenly across each of next 6 Sections up right side of Scarf. 1 sc in same sp as first 2 sc. Break D. Join MC with sl st to first sc.
2nd and 3rd rnds: With MC, ch 1. 1 scbl in each sc around working 3 scbl in each corner sc. Join with sl st to first sc. Fasten off at end of 3rd rnd.
FAQ
Questions about this pattern
Is Free Celtic Lattice Scarf Crochet Pattern good for beginners?+
Free Celtic Lattice Scarf Crochet Pattern is marked intermediate, so it is better after you have finished a few crochet patterns for beginners. Read the full instructions first and check each shaping or assembly note before starting.
What yarn weight do I need for Free Celtic Lattice Scarf Crochet Pattern?+
This pattern lists Worsted (4). If you substitute yarn, make a gauge swatch before starting so the finished size stays close to the pattern notes.
How long does Free Celtic Lattice Scarf Crochet Pattern take to crochet?+
The estimated time is 20–25 hours. Your pace may change depending on yarn choice, stitch familiarity, and how much finishing the project needs.
Do I need to check gauge for this crochet pattern?+
Yes. The pattern gauge is 11.5 sc and 14 rows = 4" [10 cm]. Use the listed hook size, U.S. J/10 (6 mm), unless your swatch tells you to adjust. Checking gauge helps avoid a finished project that is too small, too large, or too stiff.
Can I print Free Celtic Lattice Scarf Crochet Pattern?+
Yes. Use the Print button near the top of the post for a cleaner pattern view that hides interactive extras and navigation.