Instructions
Free crochet roman aqueduct throw pattern Basics
0/0Notes
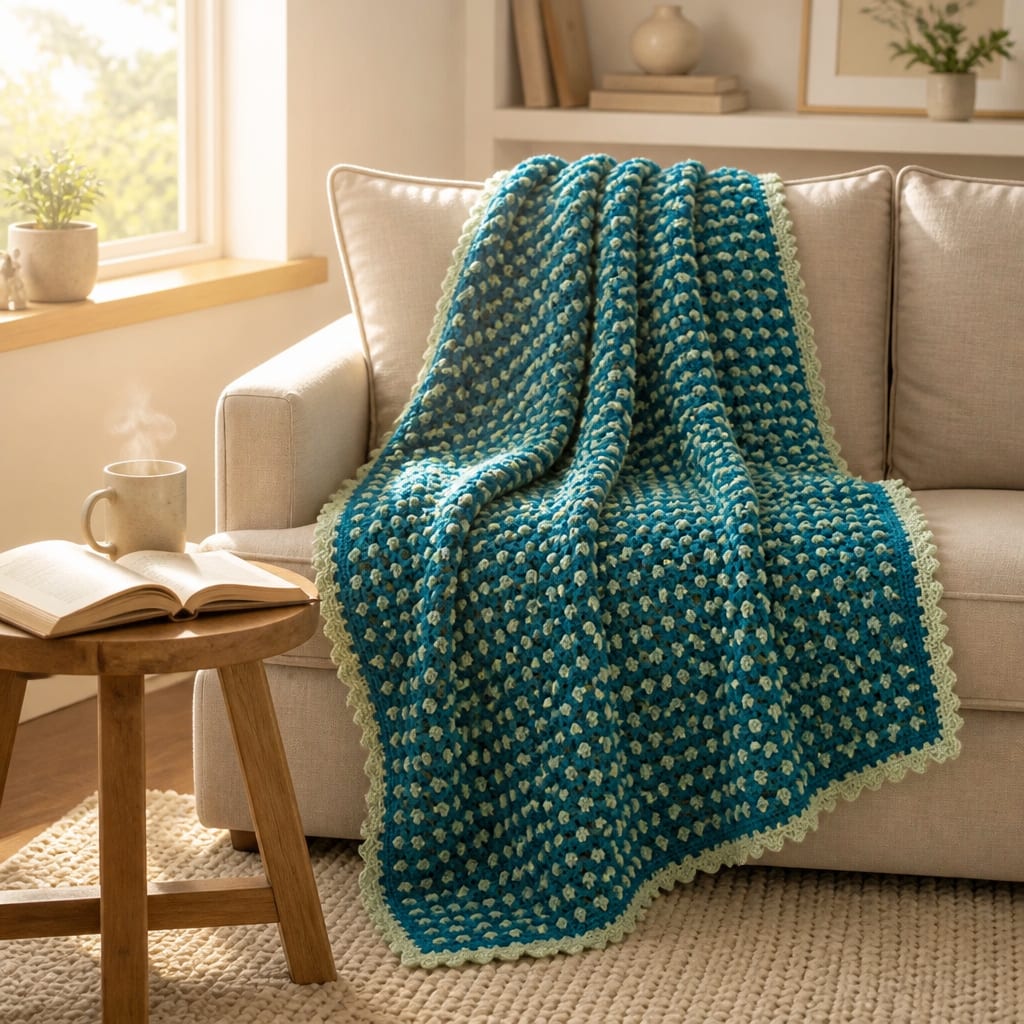
- •This Free crochet roman aqueduct throw pattern includes organized steps, materials, and helpful resources for crocheters.
- •Pay close attention when to turn work; turn every other row, not every row. Do not cut unused color; carry it along side edge. Beginning ch 3 counts as a st.
- •Helpful resources: patterns catalog, crochet patterns for adults, Craft Yarn Council, Ravelry.
Throw
0/9With A, ch 144.
Row 1 (Right Side): Dc in 4th ch from hook, dc in next ch; *skip next 2 chs, dc in next ch, 3 dc in next ch, dc in next ch; repeat from * across, ending skip next 2 chs, dc in next ch, 2 dc in final ch, drop loop from hook and place on st marker. Do NOT turn – 141 sts.
Row 2 (Right Side): Join B with sc in top of turning ch-3, sc in next st; *ch 3, skip next 2 sts, sc in next, FPhdc in next st, sc in next st; repeat from * across, ending ch 3, skip 2 sts, sc in each of last 2 sts, change to A in final st, drop B – 28 ch-3 spaces.
Row 3: Turn, with A, ch 3; *5 dc in ch-3 space; repeat from across ending, dc in final st, place A loop from hook to st marker. Do NOT turn – 142 sts.
Row 4: Starting at beginning of previous row, draw B through top of ch-3, ch 1, sc in top of ch-3, ch 1, skip next dc, *sc in next dc, BPhdc in next dc, sc in next dc, ch 3, skip next 2 dc; repeat from * across, ending sc in next dc, BPhdc in next dc, sc in next dc, ch 1, skip next st, sc in final st, changing to A – 2 ch-1 spaces; 27 ch-3 spaces.
Row 5: Turn, with A, ch 3, dc in first sc, dc in ch-1 space; *5 dc in next ch-3 space; repeat from * ending dc in ch-1 space, 2 dc in final sc, place A loop from hook to st marker. Do NOT turn – 141 sts.
Row 6: Starting at beginning of previous row, draw B through top of ch-3, ch 1, sc in top of ch-3, sc in next st; *ch 3, skip next 2 sts, sc in next, FPhdc in next st, sc in each of last 2 sts, change to A in final st, drop B – 28 ch-3 spaces.
Rows 7-125: Repeat Row 3-6 ending after a Row 5.
Fasten off.

Edging
0/5Rnd 1: Join A with sc in upper right hand corner; work an additional 138 sc across top; work 1 more sc in final st of top edge; working in ends of rows evenly work 157 sc along side edge; working in opposite side of foundation ch, *2 sc in first ch; work an additional 138 sc across bottom edge; work 1 more sc in opposite side of final ch; working in ends of rows evenly work 157 sc along second side edge; work 1 sc in same place as beginning sc – 596 sc.
Rnd 2: Ch 1 for corner; sc in each st around, placing a ch 1 between the 2 sc in each corner; ending with sc in final sc of previous row – 596 sc; 4 ch-1 spaces.
Rnd 3: (Sc, ch 1, sc) in first ch-1 space, sc in each sc around and (sc, ch 1, sc) in each ch-1 space–604 sc; 4 ch-1 spaces. Fasten off.
Rnd 4: Join B with sc in any ch-1 space, ch 3, sc in same space; sc in next 2 sts, *ch 3, skip 1 st, sc in each of next 3 sts; repeat from * until 3 sts from next corner, ch 3, skip 1 st, sc in each of next 2 sts, (sc, ch 3, sc) in ch-1 space, sc in each of next 2 sts; repeat from * around, join with slip st in beginning sc – 462 sc; 154 ch-3 spaces.
Rnd 5: Slip st in ch-3 space, (ch 3, dc, ch 2, 2 dc) in same space; *skip next sc, slip st in next sc, skip next sc, (2 dc, ch 2, 2 dc) in ch-3 space; repeat from * around, ending skip last sc, join with slip st in top of beginning ch 3. Fasten off.
Finishing
0/1Weave in yarn ends.
FAQ
Questions about this pattern
Is Free Crochet Roman Aqueduct Throw Pattern good for beginners?+
Yes. Free Crochet Roman Aqueduct Throw Pattern is marked easy and includes step-by-step instructions, materials, gauge notes, and progress checkboxes.
What yarn weight do I need for Free Crochet Roman Aqueduct Throw Pattern?+
This pattern lists Worsted (4). If you substitute yarn, make a gauge swatch before starting so the finished size stays close to the pattern notes.
How long does Free Crochet Roman Aqueduct Throw Pattern take to crochet?+
The estimated time is 15–20 hours. Your pace may change depending on yarn choice, stitch familiarity, and how much finishing the project needs.
Do I need to check gauge for this crochet pattern?+
Yes. The pattern gauge is 13 sts = 4”; and 9 rows = 4” in pattern.. Use the listed hook size, 5.5mm [US I-9], unless your swatch tells you to adjust. Checking gauge helps avoid a finished project that is too small, too large, or too stiff.
Can I print Free Crochet Roman Aqueduct Throw Pattern?+
Yes. Use the Print button near the top of the post for a cleaner pattern view that hides interactive extras and navigation.