Instructions
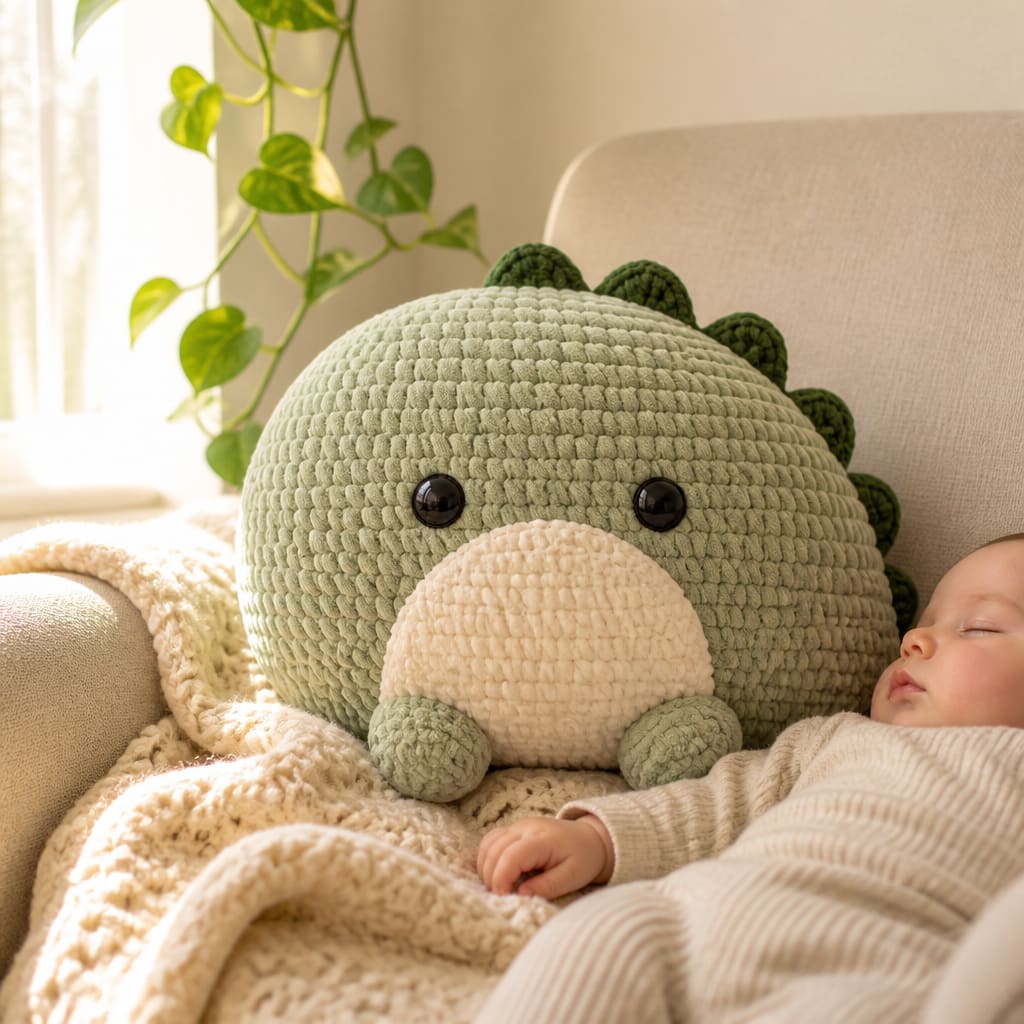
Free crochet dinosaur pillow pattern Basics
0/13Notes
- •This Free crochet dinosaur pillow pattern includes organized steps, materials, and helpful resources for crocheters.
- •All Body rnds are worked in a continuous spiral. Do not ch 1 unless directed, and do not join any rnds with a sl st unless directed.
- •Move a stitch marker along first st of each rnd as you work to keep track of your progress.
- •For more help with the magic loop, check out this Craft Yarn Council resource.
- •Helpful resources: Ravelry.
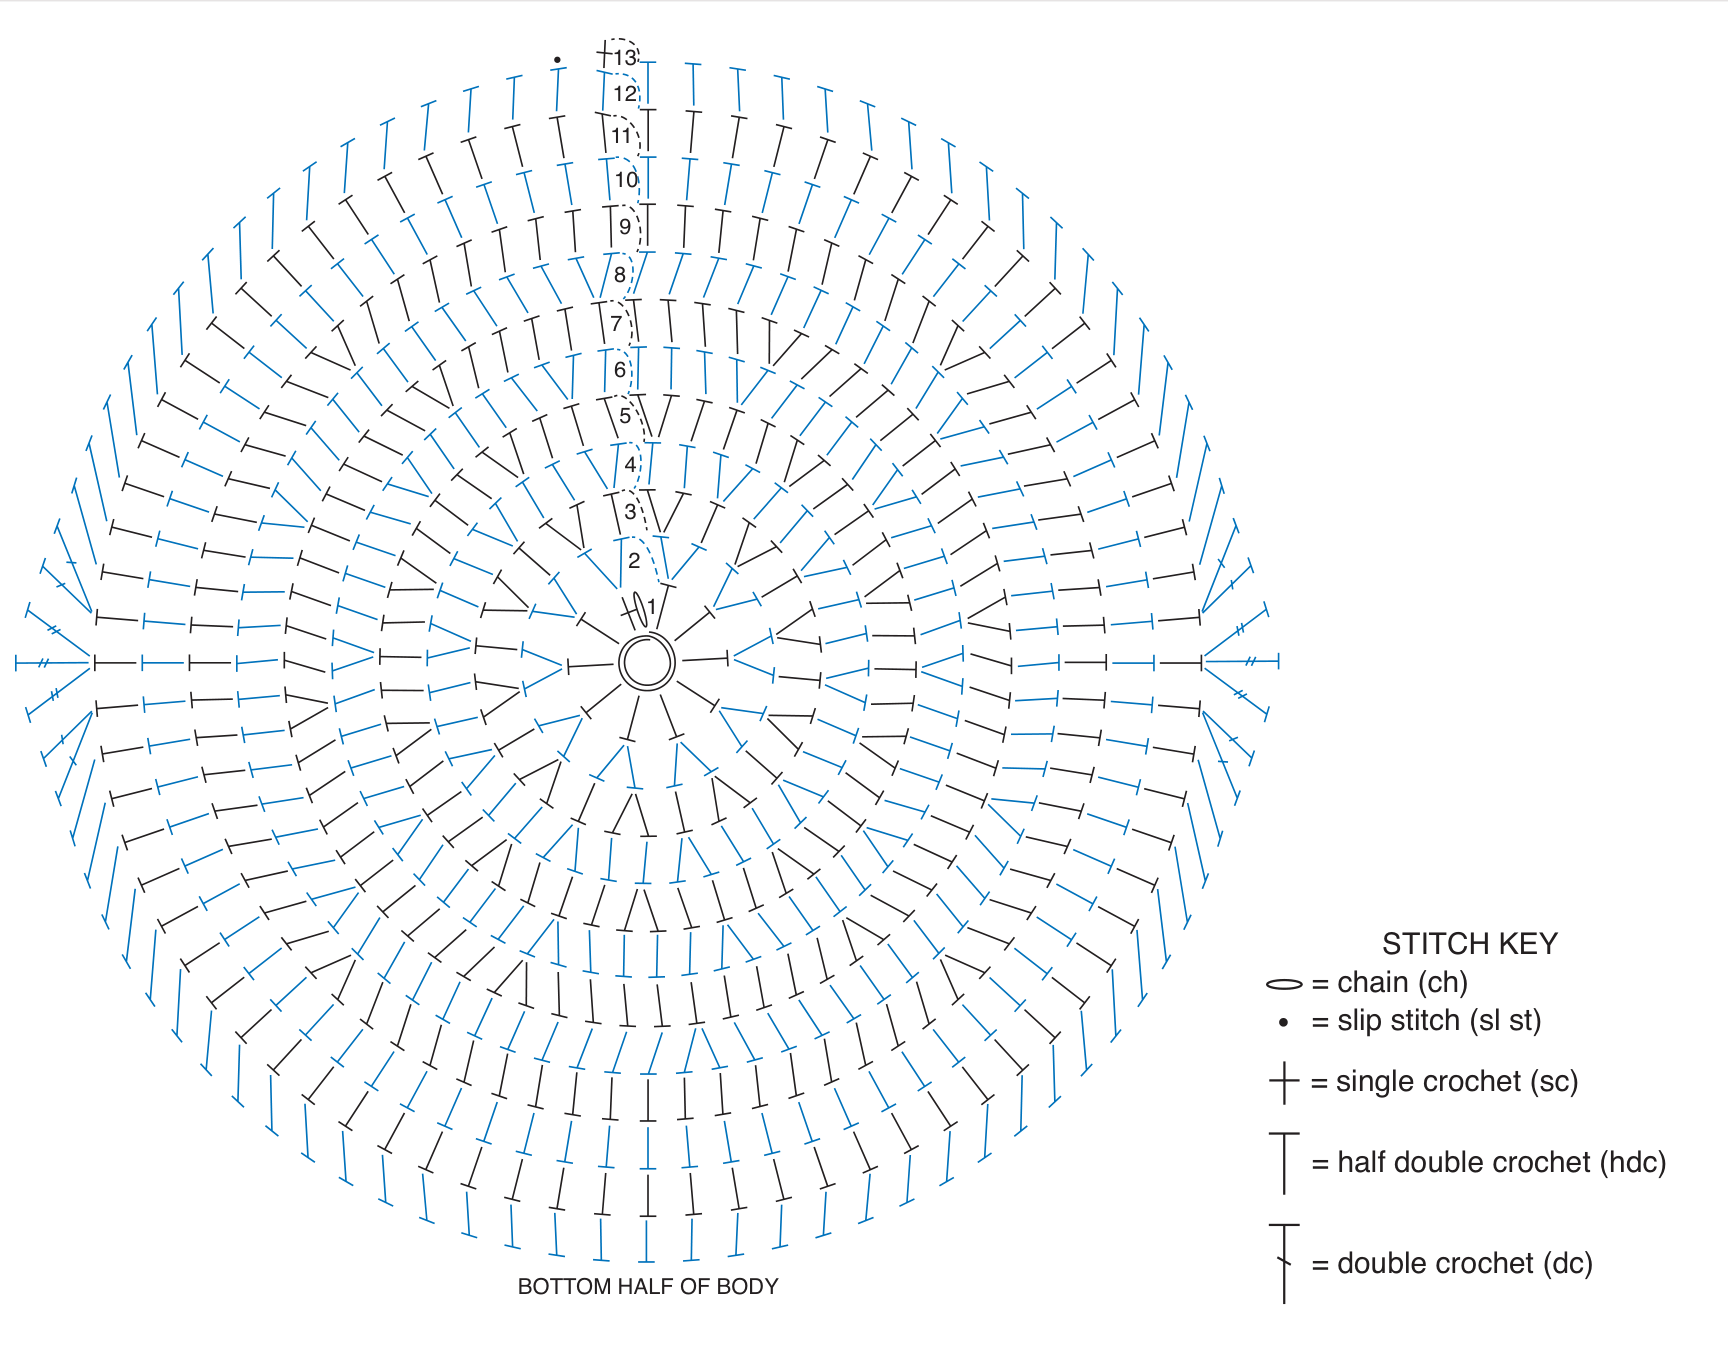
With A, beg using magic loop method.
1st rnd: Ch 1. 10 hdc in ring. 10 sts.
2nd rnd: 2 hdc in each hdc around. 20 hdc.
3rd rnd: *1 hdc in next hdc. 2 hdc in next hdc. Rep from * around. 30 hdc.
4th rnd: *2 hdc in next hdc. 1 hdc in each of next 2 hdc. Rep from * around. 40 hdc.
5th rnd: *1 hdc in each of next 3 hdc. 2 hdc in next hdc. Rep from * around. 50 hdc.
6th rnd: *1 hdc in next hdc. 2 hdc in next hdc. 1 hdc in each of next 3 hdc. Rep from * around. 60 hdc.
7th rnd: 1 hdc in each of next 5 hdc. 2 hdc in next hdc. *1 hdc in each of next 9 hdc. 2 hdc in next hdc. Rep from * until 4 hdc rem. 1 hdc in each of last 4 hdc. 66 hdc.
8th rnd: *2 hdc in next hdc. 1 hdc in each of next 10 hdc. Rep from * around. 72 hdc.
9th rnd: 1 hdc in next 8 hdc. 2 hdc in next hdc. *1 hdc in each of next 17 hdc. 2 hdc in next hdc. Rep from * until 9 hdc rem. 1 hdc in each of last 9 hdc. 76 hdc.
10th and 11th rnds: 1 hdc in each hdc around.
12th rnd: 1 hdc in each of next 17 hdc. 2 dc in next hdc. 3 tr in next hdc. 2 dc in next hdc. 1 hdc in each of next 35 hdc. 2 dc in next hdc. 3 tr in next hdc. 2 dc in next hdc. 1 hdc in each of last 18 hdc. 84 sts.
13th rnd: 1 sc in next hdc. Sl st in next hdc. Break yarn. Weave in ends and set piece aside.


Top Half of Body
0/4Notes
- •See Diagram on page 4 for visual reference.
- •Browse our patterns catalog for more fun projects.
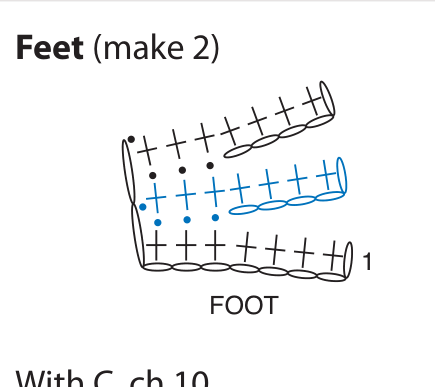
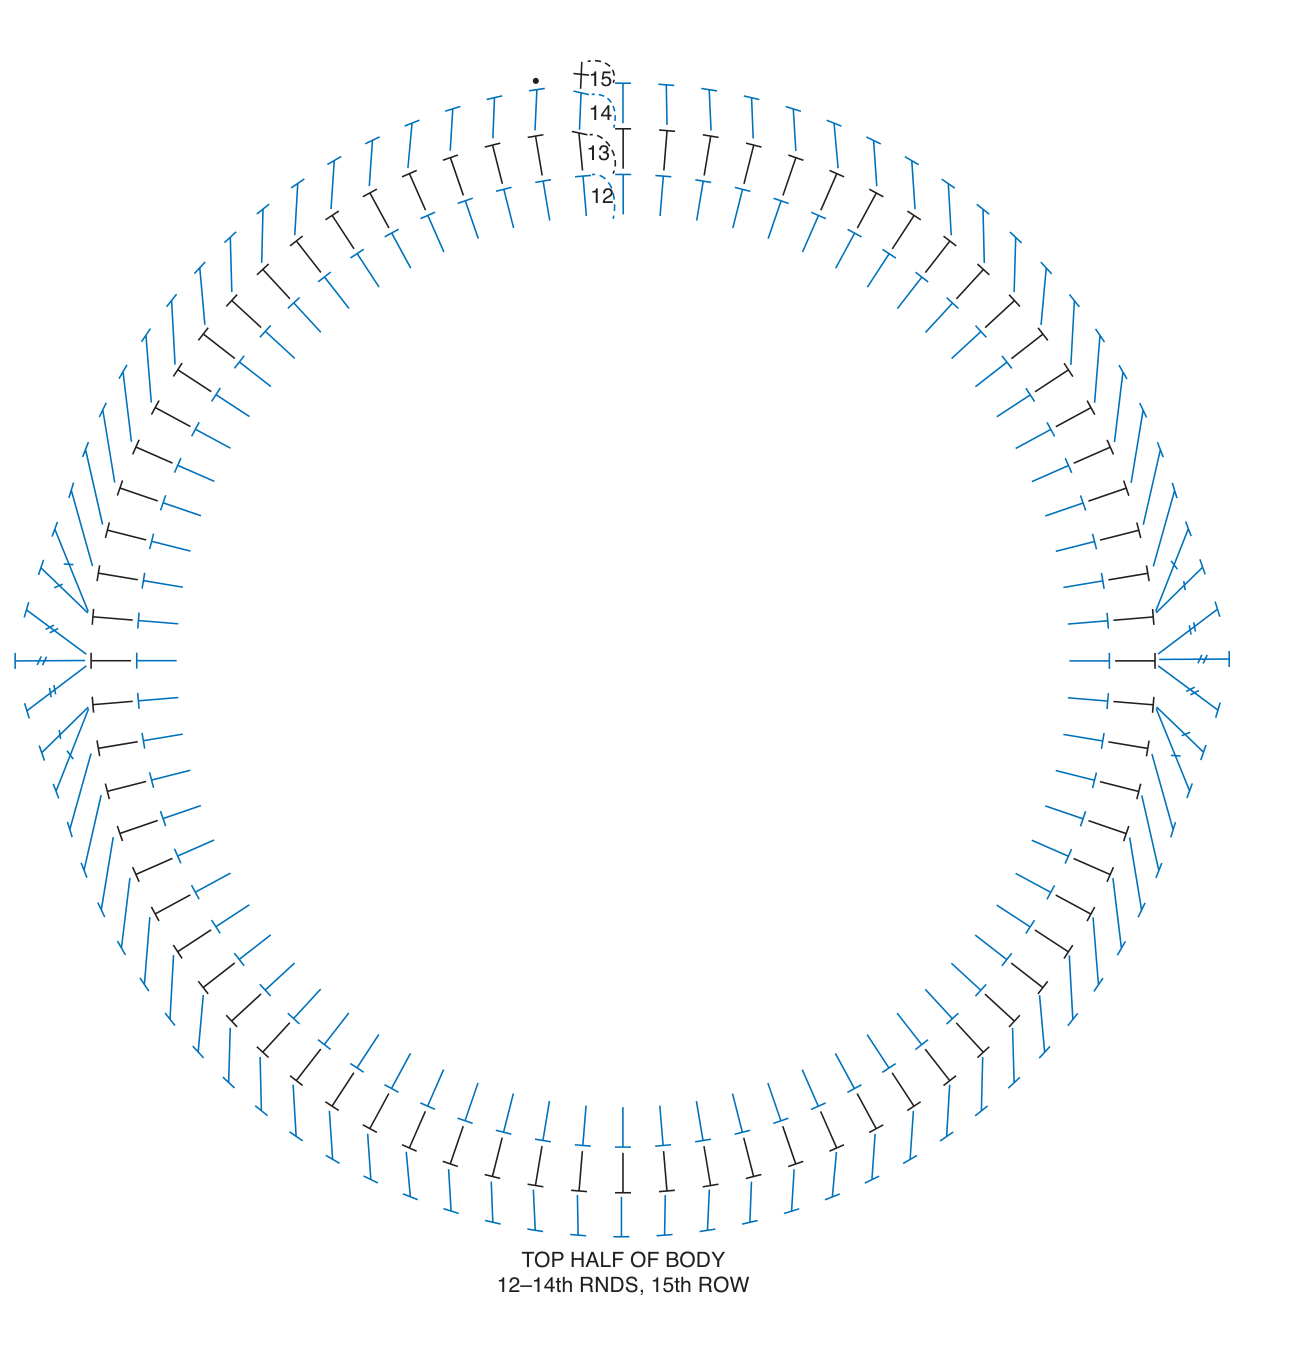
1st to 11th rnds: Rep from 1st to 11th rnds as for Bottom Half of Body.
12th and 13th rnds: 1 hdc in each hdc around.
14th rnd: 1 hdc in each of next 17 hdc. 2 dc in next hdc. 3 tr in next hdc. 2 dc in next hdc. 1 hdc in each of next 35 hdc. 2 dc in next hdc. 3 tr in next hdc. 2 dc in next hdc. 1 hdc in each of last 18 hdc. 84 sts.
15th rnd: 1 sc in next hdc. Sl st in next hdc. Break yarn leaving a long tail for sewing. Weave in first end at magic loop. Set piece aside.

Comb
0/3With B, ch 6.
1st row: 1 sc in 2nd ch from hook. (3 dc in next ch. 1 sc in next ch) twice. Turn. 9 sts.
2nd row: Ch 1. 1 sc in each st to end of row. Break yarn leaving a long tail for sewing. Set piece aside.
Tail
0/3With A, beg using magic loop method.
1st row: Ch 1. 1 sc in ring. 1 hdc in ring. 3 dc in ring. Turn. 5 sts.
2nd row: Ch 1. 2 sc in each of first 3 sts. 1 sc in each of last 2 sts. Break yarn leaving a long tail for sewing. 8 sts. Set piece aside.
Beak
0/3With C, beg using magic loop method.
1st rnd: Ch 1. 1 sc in ring. 6 hdc in ring. 7 sts.
2nd rnd: 2 hdc in each st around. Join with sl st to first hdc. 14 hdc. Break yarn leaving a long tail for sewing. Set piece aside.
Feet (make 2)
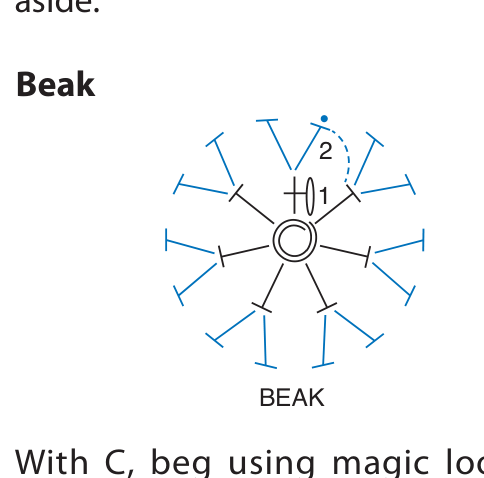
0/2With C, ch 10.
1st row: 1 sc in 2nd ch from hook. 1 sc in each of next 6 ch. (Turn. Loosely sl st in each of first 3 sts. Ch 5. Skip first ch. 1 sc in each of next 4 ch. 1 sc in each of next 3 sl sts. 1 sl st in next ch) twice. Break yarn leaving a long tail for sewing. Set pieces aside.
Assembly
0/8Notes
- •Refer to the photos for placement guidance.
- •Check out more amigurumi patterns for inspiration.
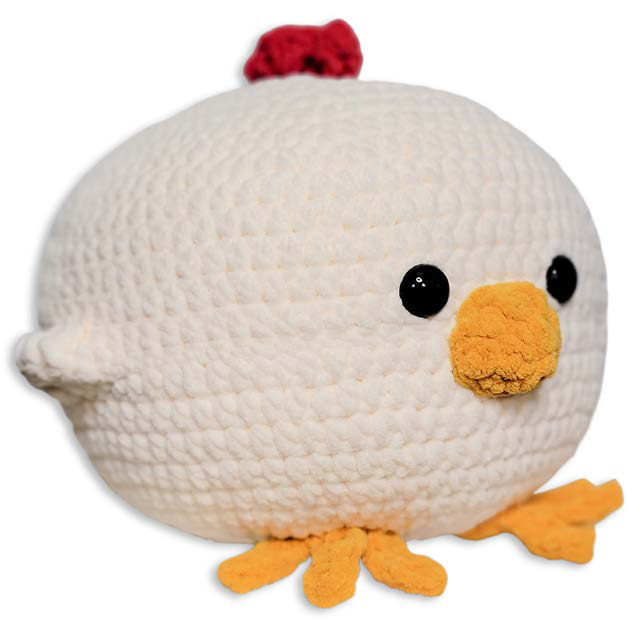
Sew Comb to center top of Top Half of Body. Be sure to position it perpendicularly to 'Wings' on sides as shown in photo.
Add Safety Eyes to Top Half of Body, on opposite side of long tail.
Sew Feet to Bottom Half of Body, leaving toes loose. Be sure to position facing away from 13th rnd. Flip one over so they are mirrored.
Sew Tail to Bottom Half of Body, at end of 2nd row of tail. Be sure to position behind Feet, centered between Wings. Sew around 11th/12th rnd of Body.
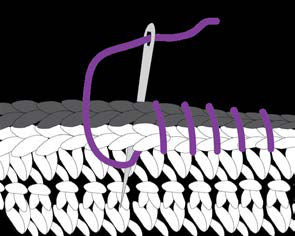
Use long tail on Top Half of Body to whipstitch Top and Bottom tog JUST OVER HALFWAY around. Be sure to align Wings, and face Eyes and Feet in same direction. Stop just a few sts past second safety eye.
Sew Beak to front, between Eyes, overlapping seam. Push Beak out a bit while sewing to create a 'beaky shape.'
Insert pillow ball or fill with fiberfill.
Finish using long tail on Top Half of Body to whip stitch Top and Bottom tog.

FAQ
Questions about this pattern
Is Free Crochet Dinosaur Pillow Pattern good for beginners?+
Yes. Free Crochet Dinosaur Pillow Pattern is marked easy and includes step-by-step instructions, materials, gauge notes, and progress checkboxes.
What yarn weight do I need for Free Crochet Dinosaur Pillow Pattern?+
This pattern lists Super Bulky (6). If you substitute yarn, make a gauge swatch before starting so the finished size stays close to the pattern notes.
How long does Free Crochet Dinosaur Pillow Pattern take to crochet?+
The estimated time is 8–12 hours. Your pace may change depending on yarn choice, stitch familiarity, and how much finishing the project needs.
Do I need to check gauge for this crochet pattern?+
Yes. The pattern gauge is 7 sc and 8 rnds = 4" [10 cm] with A.. Use the listed hook size, U.S. L/11 (8 mm), unless your swatch tells you to adjust. Checking gauge helps avoid a finished project that is too small, too large, or too stiff.
Can I print Free Crochet Dinosaur Pillow Pattern?+
Yes. Use the Print button near the top of the post for a cleaner pattern view that hides interactive extras and navigation.