Pattern guide
Helpful notes for making this pattern
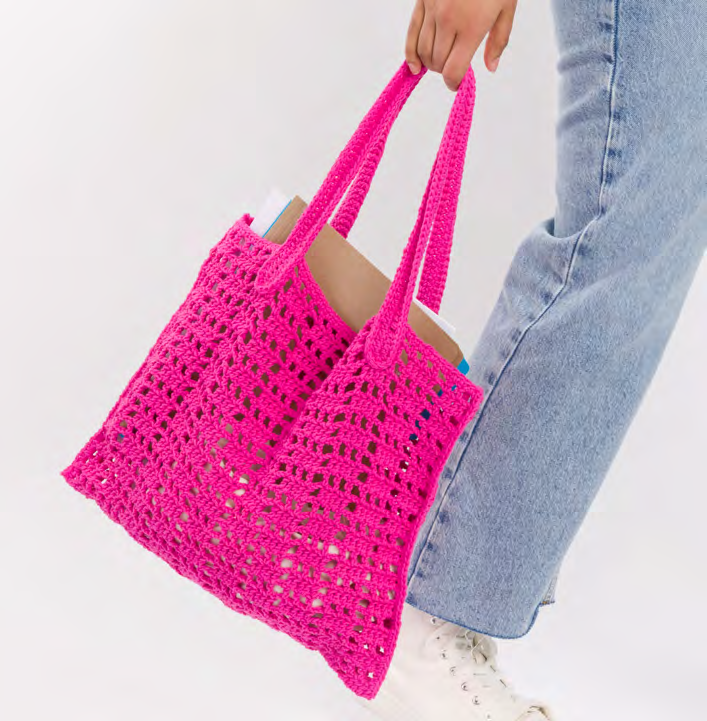
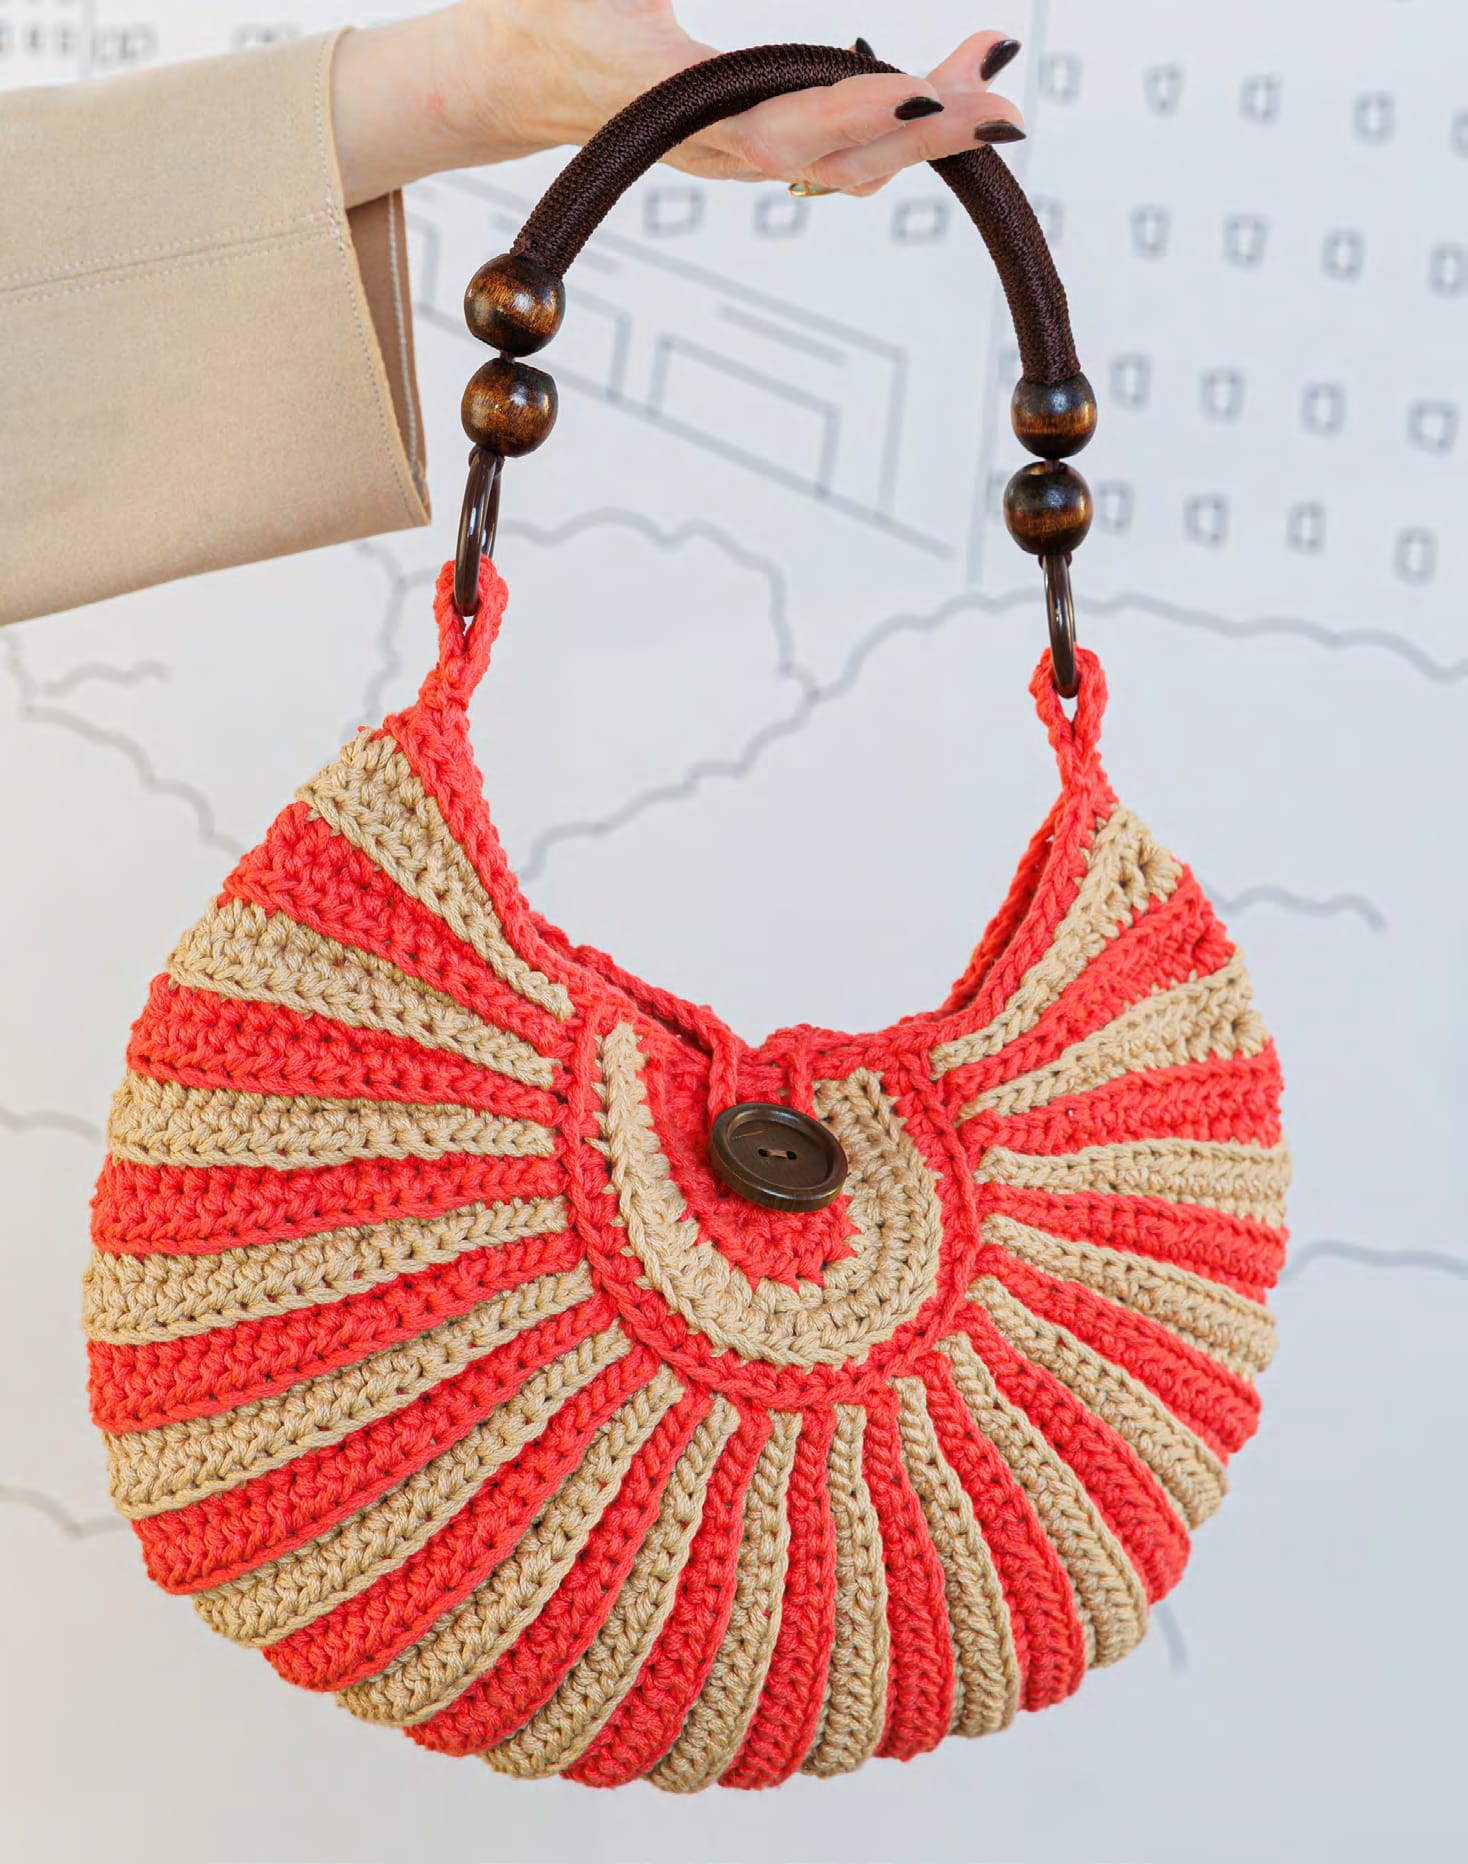
This Free Chic Crochet Bag Pattern is perfect for those looking to enhance their crochet skills while creating a stylish accessory. With a medium yarn weight and an intermediate skill level, this project is both rewarding and practical. The finished bag measures approximately 14 inches wide and 10 inches deep, making it a versatile addition to your wardrobe. Ideal for everyday use, it showcases a unique design that can complement various outfits, making it a must-try for any crocheter aiming to elevate their craft.
Why this project is worth making
- The bag's spacious design is perfect for carrying essentials, making it a practical choice for daily use.
- This project allows you to practice and improve your crochet techniques, particularly in working with multiple strands.
- The chic aesthetic of the bag makes it a fashionable accessory that can be customized to suit your personal style.
Maker tips before you begin
- Ensure your gauge matches the pattern to achieve the correct size; consider making a swatch before starting.
- Use stitch markers to keep track of your rows and avoid losing your place, especially when working with multiple colors.
- Pay attention to the instructions regarding working in back loops only, as this creates the bag's texture.
- Keep your tension even throughout the project to maintain a consistent look and feel in your finished bag.
Ways to customize it
- Experiment with different color combinations for the yarn to create a bag that reflects your personal style.
- Adjust the size of the bag by adding or subtracting rows and stitches according to your needs.
- Consider adding embellishments like beads or patches to personalize your bag further and make it unique.
Troubleshooting notes
- If your bag is turning out smaller than expected, double-check your gauge and ensure you are using the correct hook size.
- To avoid uneven edges, be mindful of your stitch count on each row, especially when joining pieces.
- If the bag feels too floppy, consider adding a lining for additional structure and durability.
Care and finishing
- After completing your bag, block it gently to shape the edges and enhance its overall appearance.
- When washing, use a gentle cycle and lay flat to dry to maintain the integrity of the yarn and the bag's shape.
Instructions
Back
0/34Notes
- •Note: Ch 2 at beg of rows does not count as st.
With 2 strands of A held tog, ch 8.
1st row: (RS). 1 hdc in 3rd ch from hook.
1 hdc in each of next 4 ch.
5 hdc in last ch.
Do not turn. Working in rem loops of foundation ch, 1 hdc in each of next 5 ch.
Turn. 15 hdc.
2nd row: Ch 2.
1 hdc in first hdc.
1 hdc in each of next 4 hdc.
Yoh and draw through last 2 loops on hook.
2 hdc in each of next 5 hdc.
1 hdc in each of next 5 hdc.
Join B.
Turn. 20 hdc.
3rd row: With B, ch 2.
1 hdc in first hdc.
1 hdc in each of next 4 hdc.
(2 hdc in next hdc. 1 hdc in next hdc) 5 times.
1 hdc in each hdc to end of row.
Turn. 25 hdc.
4th row: Ch 2.
1 hdc in first hdc.
1 hdc in each of next 4 hdc.
(2 hdc in next hdc. 1 hdc in each of next 2 hdc) 5 times.
1 hdc in each hdc to end of row.
Join A.
Turn. 30 hdc.
5th row: With A, ch 2.
Working in back loops only, 1 hdc in first hdc.
1 hdc in each of next 4 hdc.
(2 hdc in next hdc. 1 hdc in each of next 3 hdc) 5 times.
1 hdc in each hdc to end of row.
35 hdc.
Fasten off.
Front
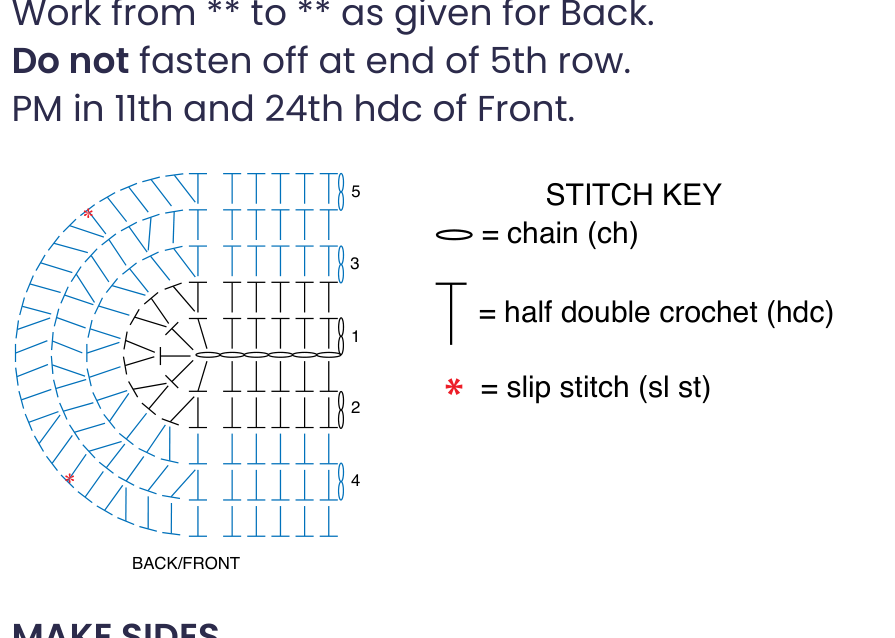
0/112nd row: (RS). With B, ch 1.
Working in back loops only, sl st in each of first 4 sl st.
1 sc in each of next 4 sc.
1 hdc in each of next 4 hdc.
3 hdc in next hdc.
1 hdc in each of next 4 hdc.
PM in 11th and 24th hdc of Front.
1 sc in each of next 4 sc.
Sl st in each of last 4 sl st.
With RS of Back facing, join with sl st in back loop of 2nd hdc of Back.
Turn. 27 sts.
Sides
0/14Notes
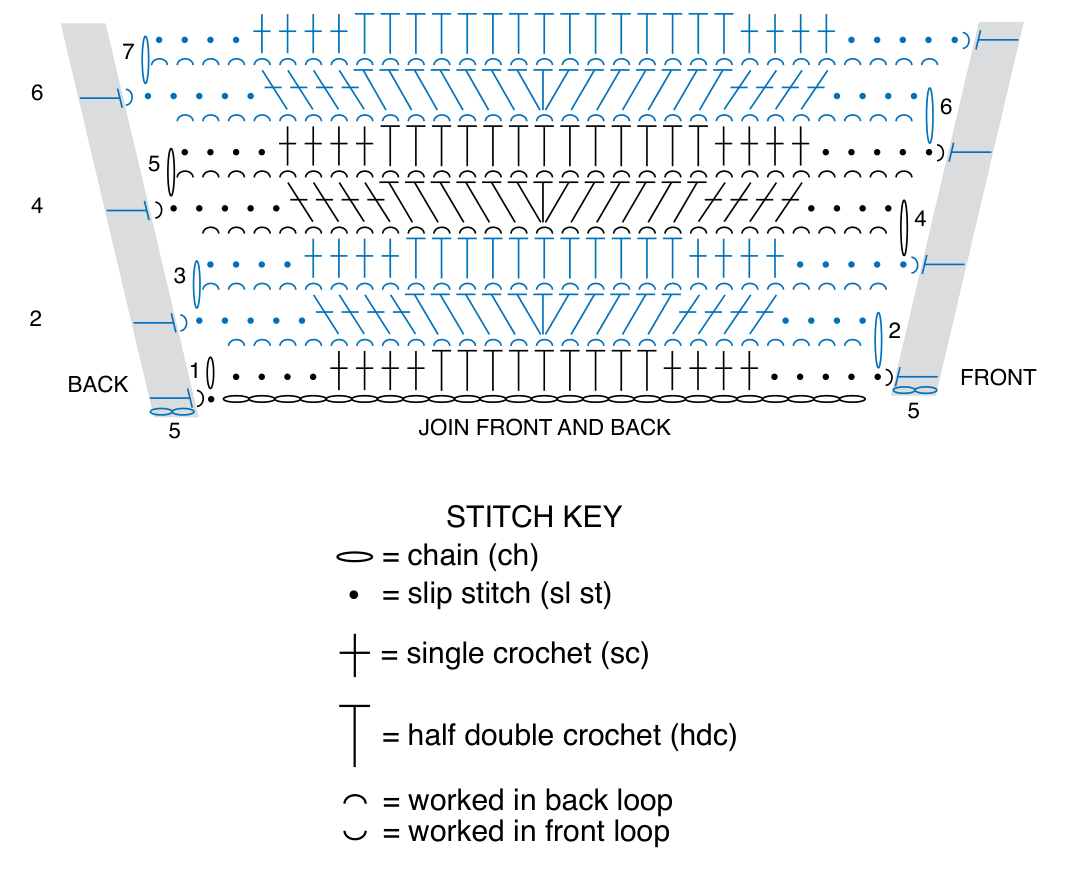
- •Sides are created by working in rows, at same time, joining Front and Back pieces with sl sts at end of rows.
- •All sts of Sides are worked into back loops.
Join Front and Back: With A from last row of Front, ch 25.
With RS of Back facing, join with sl st in front loop, to first hdc of 5th row of Back.
Turn.
1st row: (WS). With WS of chain facing, ch 1.
Sl st in first ch (be careful not to count sl st as a ch).
Sl st in each of next 3 ch.
6 hdc.
3 hdc in next hdc.
1 hdc in each of next 6 hdc.
1 sc in each of next 4 ch.
Sl st in each of last 4 ch.
With WS of Front facing, join B with sl st in front loop to first hdc of Front.
Turn.
25 sts.
Bottom
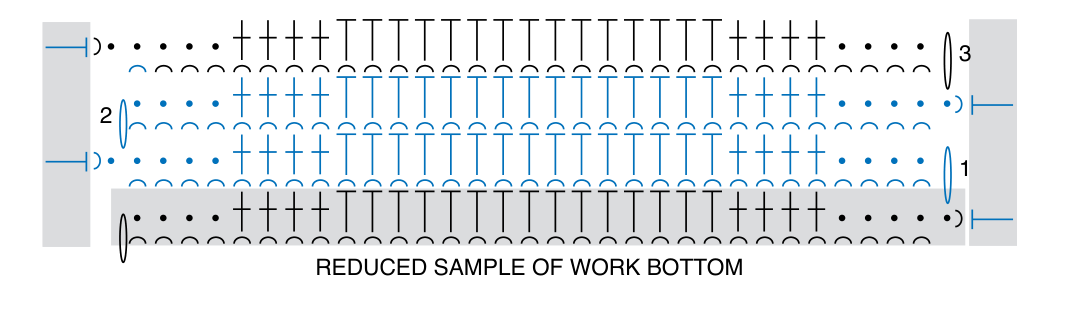
0/13Work Bottom: 1st row: (RS). With B, ch 1.
Working in back loops only, sl st in each of first 4 sl st.
1 sc in each of next 4 sc.
1 hdc in each of next 29 hdc.
1 sc in each of next 4 sc.
Sl st in each of last 4 sl st.
With RS of Back facing, join with sl st in back loop of next hdc of Back.
Turn.
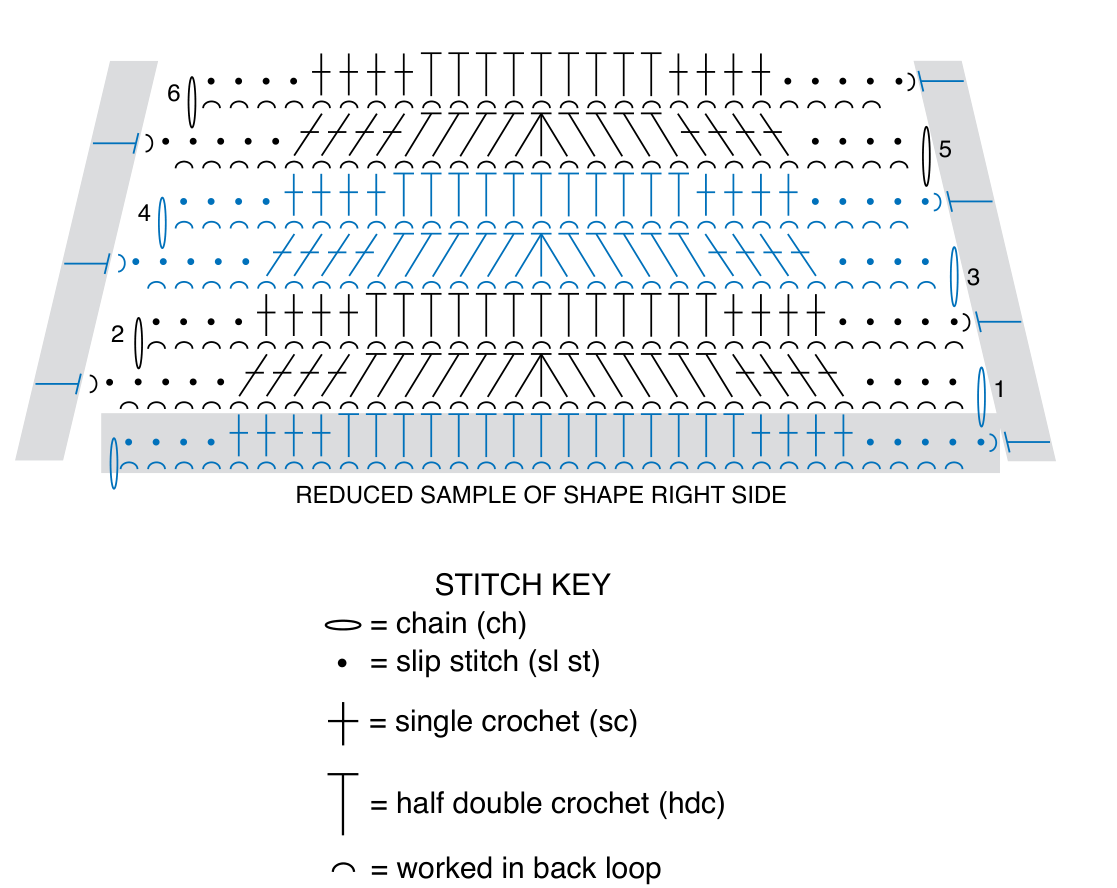
Cont as established, inc 2 hdc every other row, while working 2 rows each in A and B to first marker (in 11th hdc of Front).
There should be 45 sts between Front and Back, ending with 1 sc in each of next 4 sc.
Sl st in each of last 4 sl st.
With WS of Front facing, join A with sl st in front loop of next hdc of Front.
Rep last 2 rows 12 times more to 2nd marker (24th hdc of Front), working 2 rows each in A and ending with 2 rows of B.
Finishing
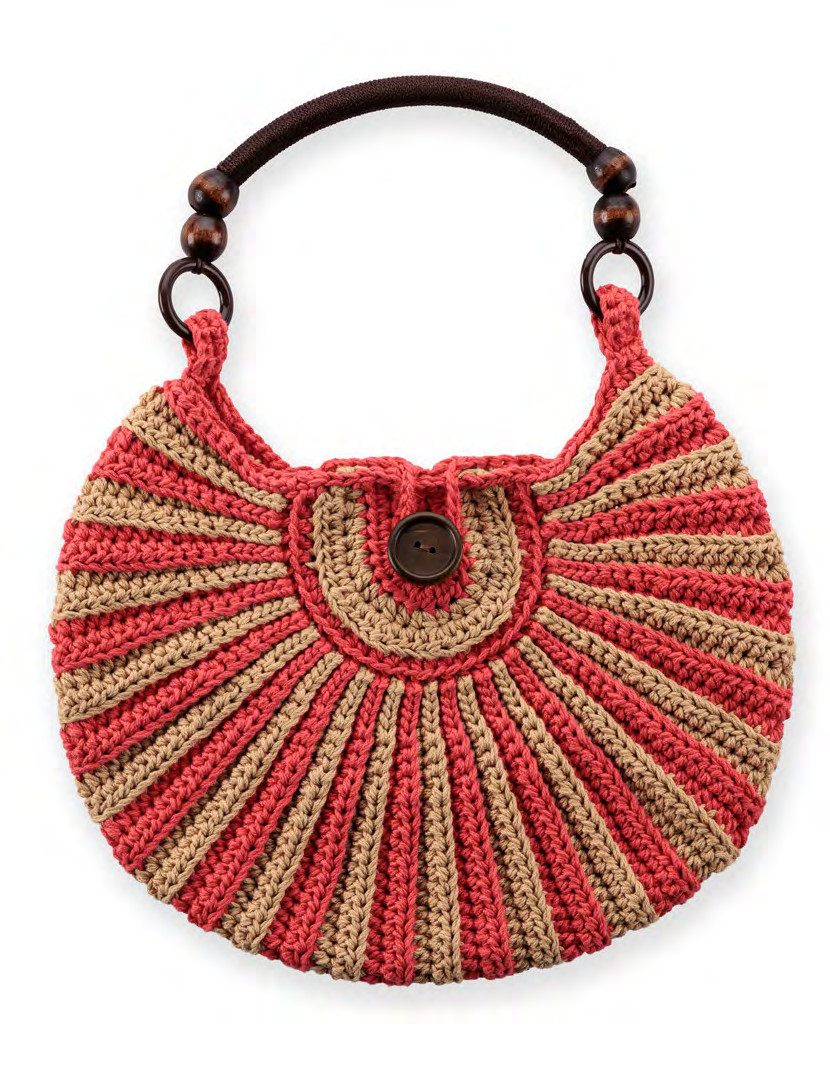
0/19Back Edging: Working along side edge of Back piece, ch 1.
Work 6 sc evenly along straight side edge to center.
Ch 14 for button loop.
Work 6 sc evenly to end of Back piece.
Fasten off.
Front Edging: With RS facing, join 2 strands of A with sl st to side edge of Front piece at right corner.
Ch 1. Work 12 sc evenly along straight side edge.
Fasten off.
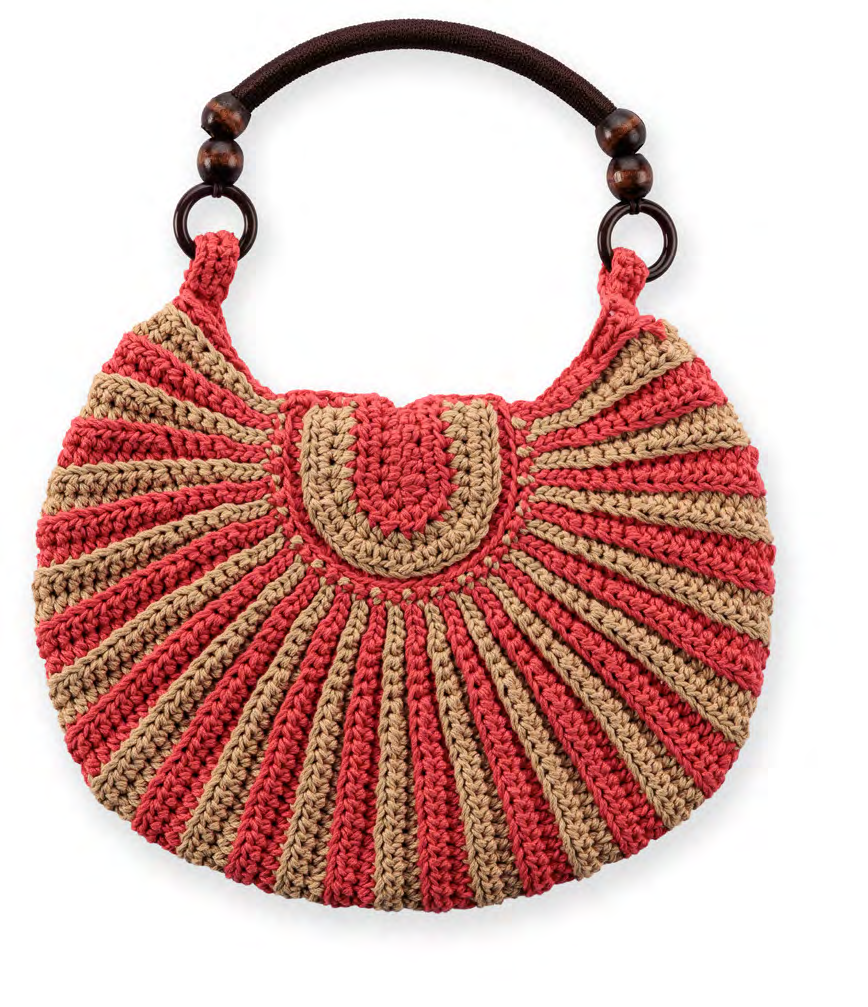
Sew button to Front to align with button loop.
Handle Tabs (Make 2): With 2 strands A held tog, ch 9.
1st row: (RS). 1 sc in 2nd ch from hook.
1 sc in each ch to end of chain.
Turn. 8 sc.
2nd row: Ch 1. 1 sc in each sc to end of row.
Turn.
Attach to Handle: Loop Tab through Handle ring, bringing WS of Tab tog.
Ch 1. Working through both thicknesses, work 2 sc along side of Tab to join.
Fasten off leaving a long tail.
Using tail, sew Tabs to Bag at each side edge along top.
FAQ
Questions about this pattern
Is Free Chic Crochet Bag Pattern for You good for beginners?+
Free Chic Crochet Bag Pattern for You is marked intermediate, so it is better after you have finished a few crochet patterns for beginners. Read the full instructions first and check each shaping or assembly note before starting.
What yarn weight do I need for Free Chic Crochet Bag Pattern for You?+
This pattern lists Medium (4). If you substitute yarn, make a gauge swatch before starting so the finished size stays close to the pattern notes.
How long does Free Chic Crochet Bag Pattern for You take to crochet?+
The estimated time is 15–20 hours. Your pace may change depending on yarn choice, stitch familiarity, and how much finishing the project needs.
Do I need to check gauge for this crochet pattern?+
Yes. The pattern gauge is 13 sc and 14 rows = 4" [10 cm] with 2 strands held tog.. Use the listed hook size, U.S. H/8 (5 mm), unless your swatch tells you to adjust. Checking gauge helps avoid a finished project that is too small, too large, or too stiff.
Can I print Free Chic Crochet Bag Pattern for You?+
Yes. Use the Print button near the top of the post for a cleaner pattern view that hides interactive extras and navigation.