Step by step
Start from a center
Rounds begin from a ring, chain loop, or center stitch group. Keep the center loose enough to work into.
Check: You can identify the center of the round.
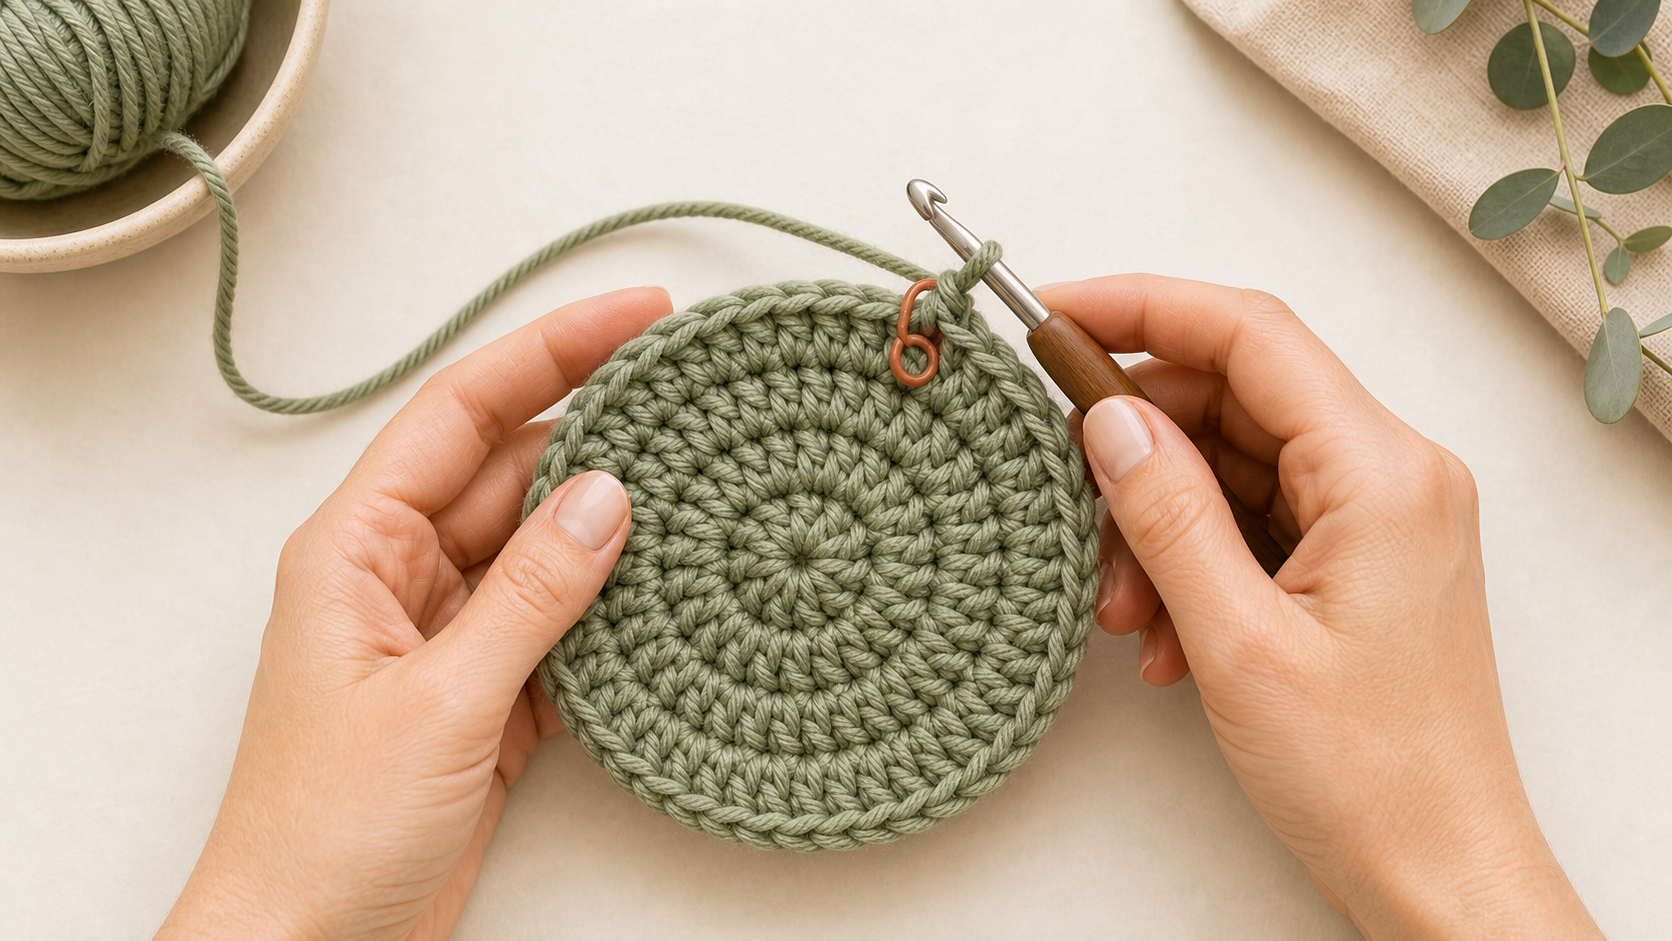
Mark the beginning
Use a stitch marker to mark the first stitch of the round. Move it up each round if the pattern asks you to.
Check: You always know where the round starts.
Count every round
Circle patterns often increase by a set number of stitches each round. Count before moving on.
Check: Your round count matches the pattern.
Watch the fabric shape
If the circle cups, you may need more increases. If it ripples, there may be too many increases or loose tension.
Check: The fabric shape matches the project goal.
Join or spiral as written
Some rounds join with a slip stitch, while others continue in a spiral. Follow the pattern method consistently.
Check: You know whether the pattern uses joined rounds or continuous rounds.
Practice
- Make a small flat circle and mark the first stitch of every round.
- Count the stitches after each round.
- Try one joined round and one continuous round sample.
Common mistakes
You lose the start of the round.
Use a stitch marker every time, even for a small practice circle.
The circle curls into a bowl.
Check whether you missed increases or tightened your tension.
The circle gets wavy.
Check for extra increases or use a slightly smaller hook for practice.